How to Optimize User Interactions with Debounce
Debounce Overview
What is Debounce?
Debounce is a technique that prevents a function being called too frequently in a short period of time. Imagine a doorbell—if someone keeps pressing it quickly, it might ring over and over, annoying everyone inside. A debounce mechanism would make the doorbell ring only once, no matter how many times it’s pressed within a short period.
Why Debounce?
Let’s say you’re filling out a feedback form. After typing your feedback, you accidentally click the "Submit" button multiple times.
Without debounce, every single click you make will send a separate request to the server. Here’s why that’s a problem:
Duplicate Entries: The same feedback could be saved multiple times in the database, creating a mess for both users and administrators.
Increased Server Load: Each click sends a request to the server. If hundreds of users do this, the server could get overwhelmed, slowing down the app for everyone or even crashing it.
Worse User Experience: Users might see delays, errors, or confusing behavior, like multiple confirmation messages. This makes the app feel unreliable or broken.
How Debounce Solves This:
By using debounce, the button disables immediately after the first click. This ensures only one request is sent to the server, even if the user clicks multiple times. It keeps the app running smoothly and provides a better experience for everyone.
How to Use Debounce in Your Momen Project?
In Momen, you can implement debounce functionality in your app using a combination of a countdown action, a conditional container, and an ActionFlow. We use a submit button in a form as an example.
Check the demo here:
Read-Only Project Link: Project Link
Live Demo: Effect Demo
A preview of final result (compared alongside a non-debounced button for clarity)
Countdown Action: We create a countdown timer that starts when the user clicks the Submit button. This timer will control how long the button stays disabled. For example, you can set it to 10 seconds before the button becomes clickable again.
This container has three states:
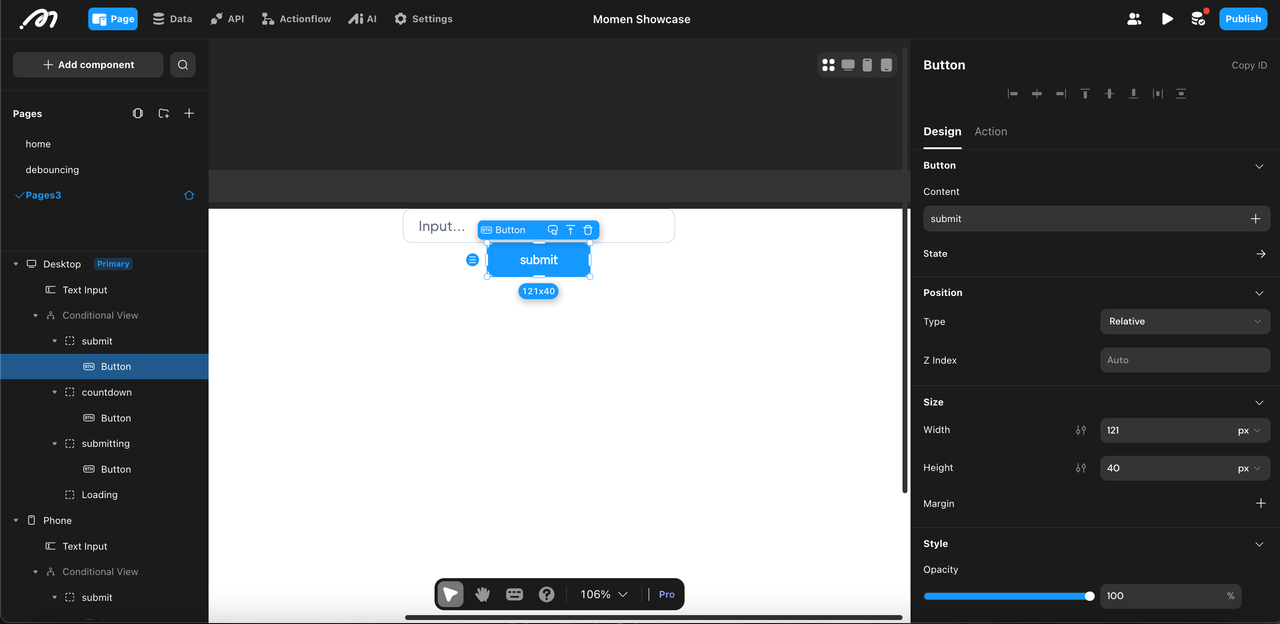
Submit (Clickable)
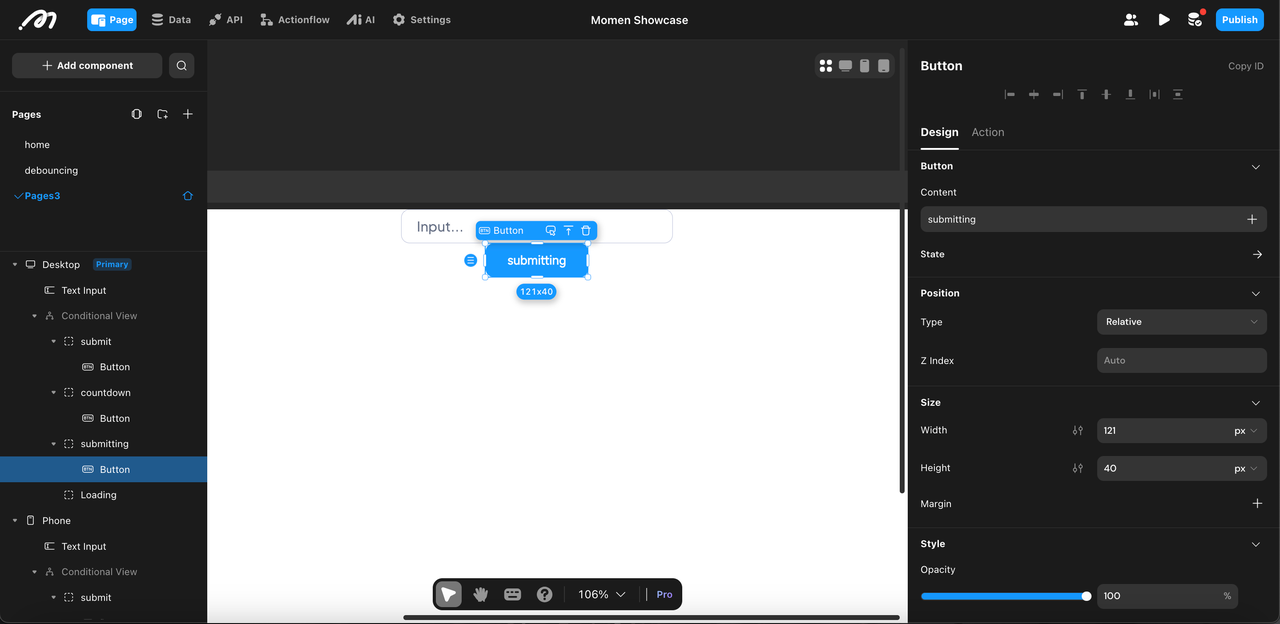
Submitting (Disabled)
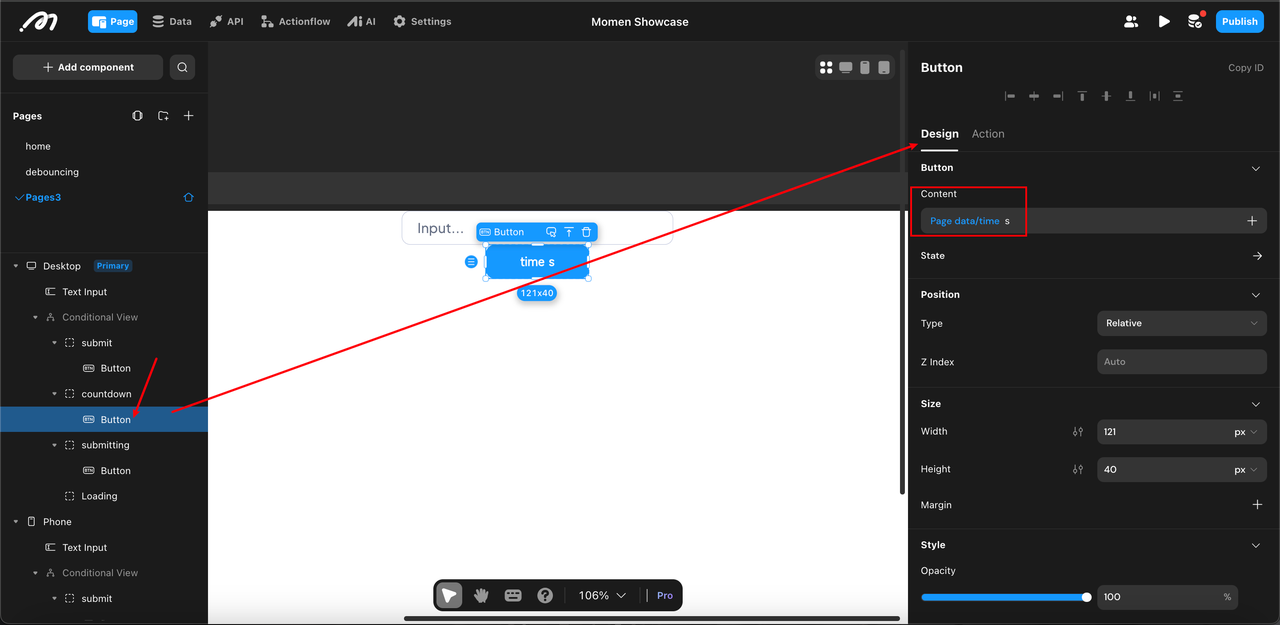
Countdown (Disabled, shows timer)
When the user clicks the button, it immediately switches to the Submitting state (disabling the button). Once the countdown finishes, it switches back to the Submit state (making the button clickable again).
Actionflow: An Actionflow handles the logic for submitting the form data. When the button is clicked, the ActionFlow runs, and only after it finishes does the countdown begin to allow the button to be re-enabled.
Below is the step-by-step guide.
Create the Data Model (data)
Enter Data, then add a model named
feedback.Add a single field named
messageof type Text. Because this is a test, we only add one field. Normally a form will have different fields. You can refer to our expert form on the Momen website.
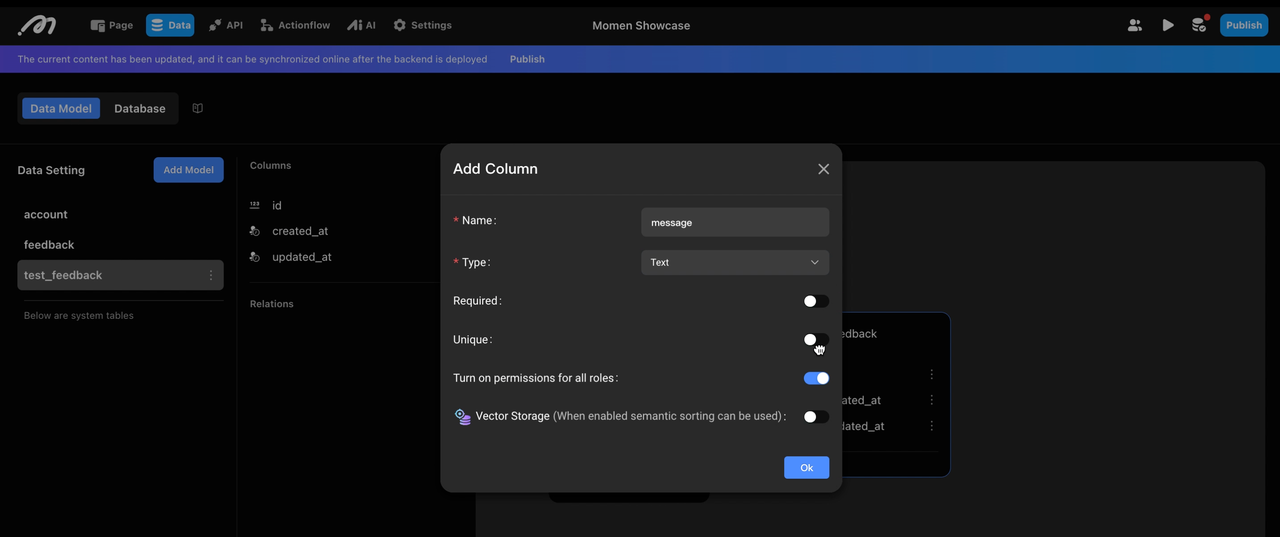
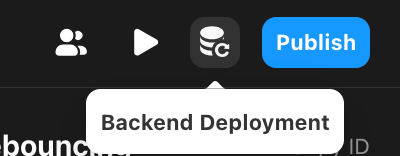
Click publish in the banner to deploy the backend.
Set up Frontend (design)
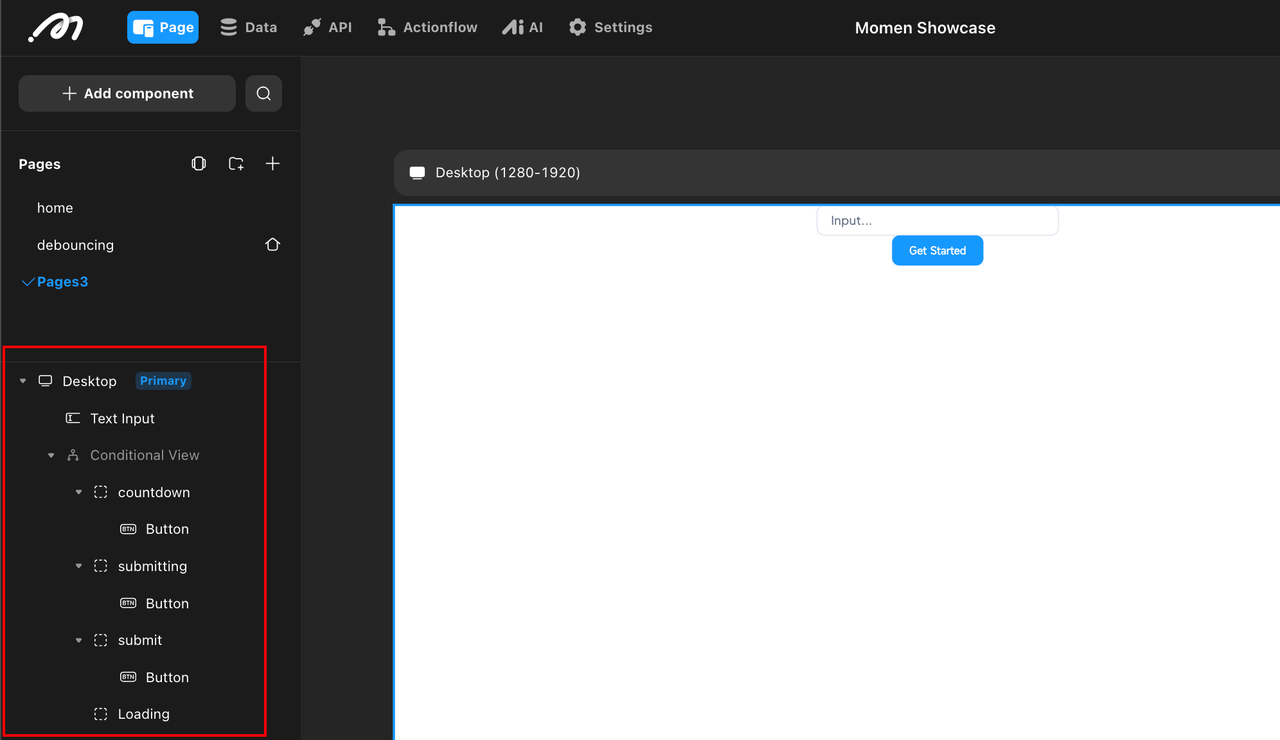
Drag and drop components or use shortcuts to create:
An input field for the feedback message.
A button inside a conditional container with three states:
Submit (clickable)
Submitting (disabled)
Countdown (disabled)
Configure Data and Action (logic)
Once the backend and frontend are set up, we can connect them using data binding. First of all, create an Actionflow for adding feedback.
Create Actionflow
Create an Actionflow with a
messageparameter.
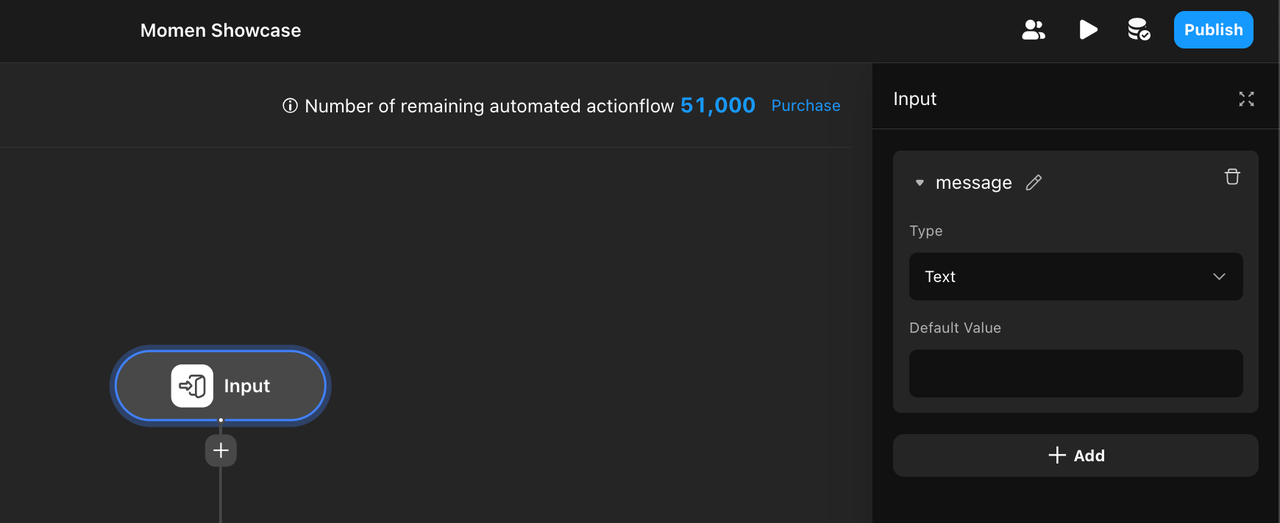
Add an Insert node to insert feedback into the database. The message here is the input parameter of the Actionflow.
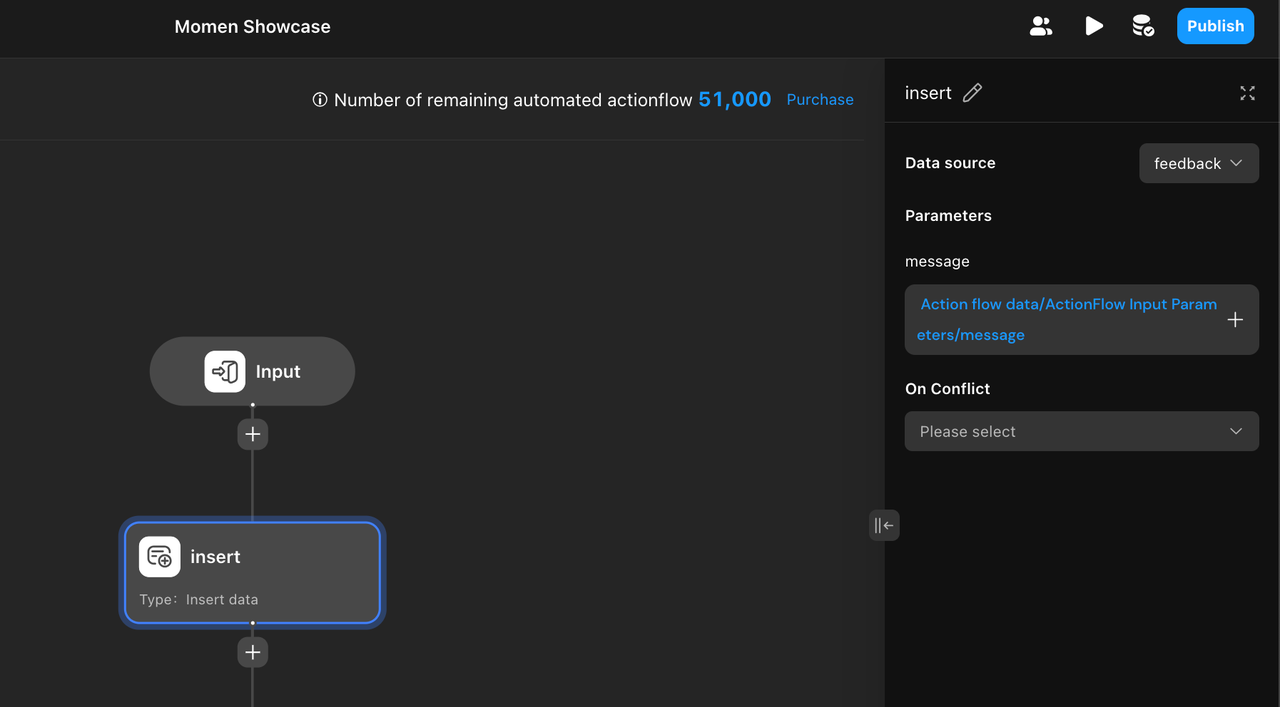
Save and deploy Actionflow. Make sure your Actionflow is updated and deployed before update your backend. Otherwise the latest version won't be saved.
The main advantage of using Actionflow instead of managing actions directly on the frontend lies in the complexity of form submission logic. For instance, determining if data already exists or ensuring a user can only submit once can become challenging. To effectively address such complexities, the most efficient approach is to encapsulate this logic within Actionflow, execute it on the backend, and then provide the appropriate response.
Configure Button Logic
Once the Actionflow is saved, we configure the button. Here's the overview of the logic:
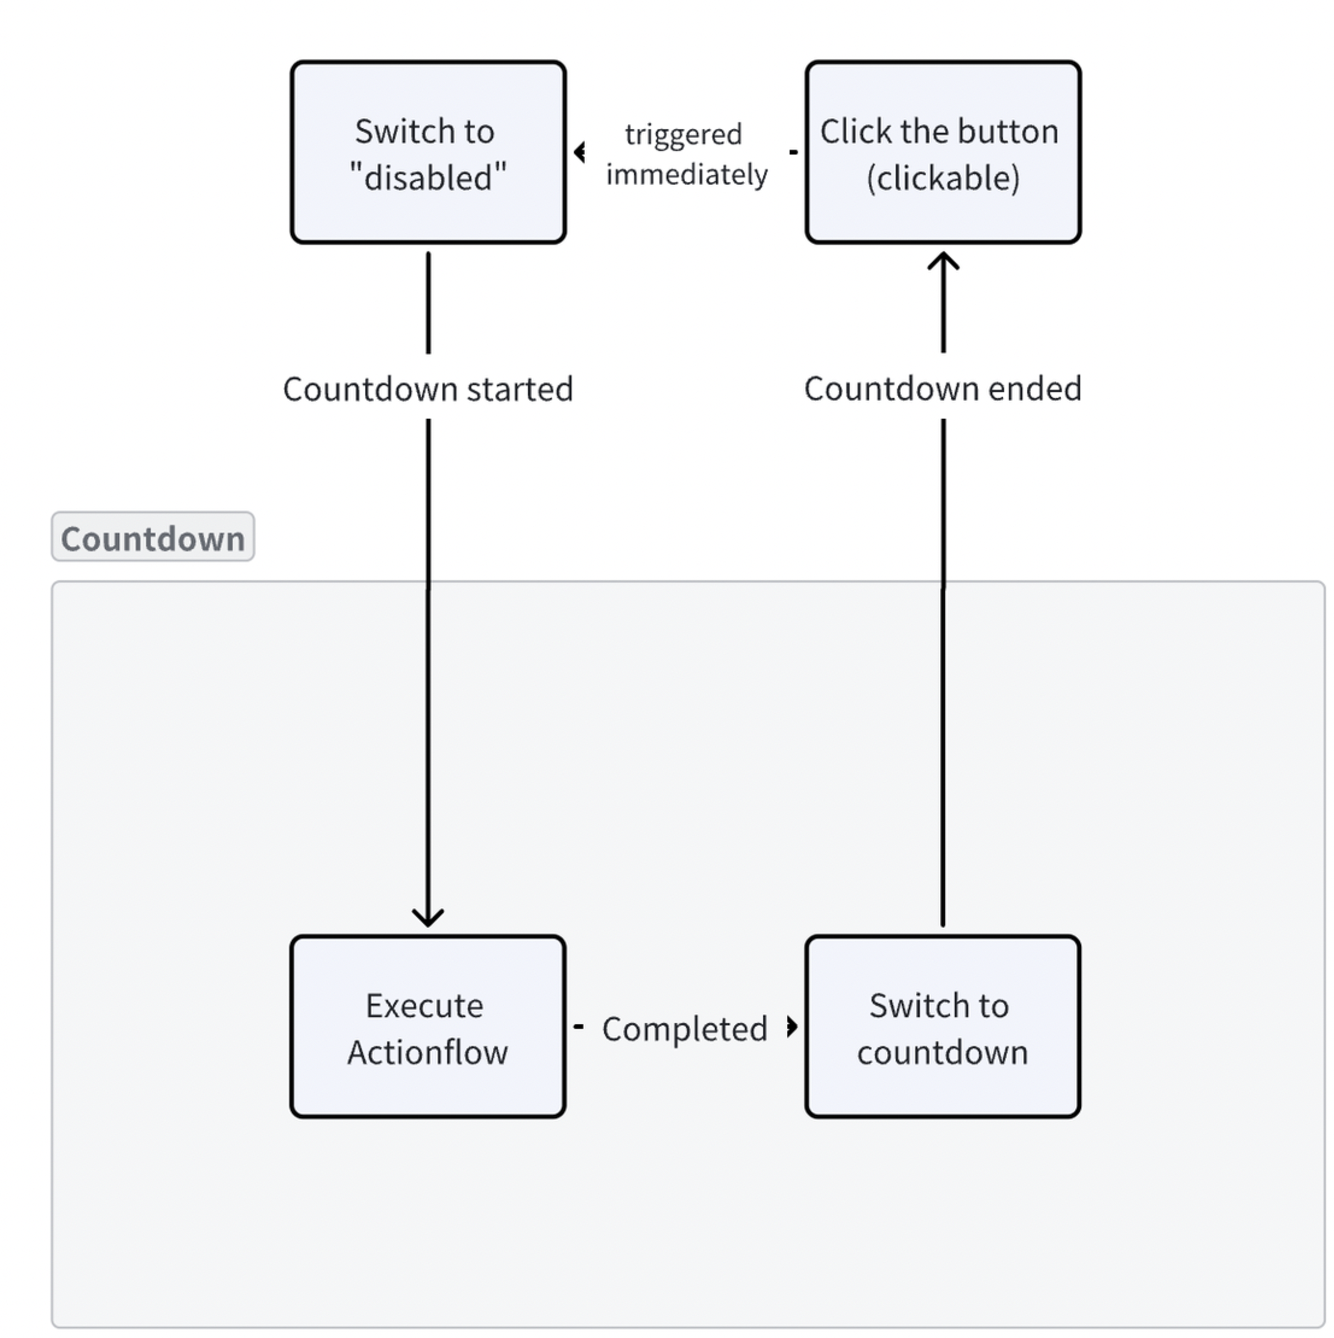
Based on this logic, we configure the conditional container on the frontend.
On click, switch to Submitting.
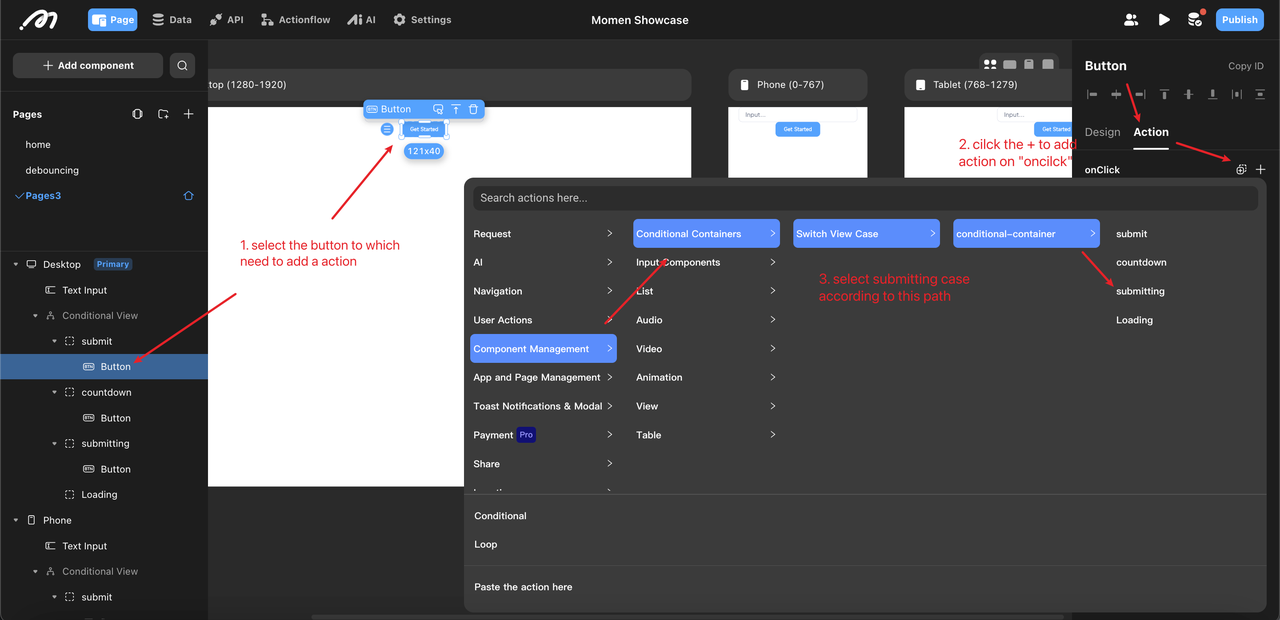
Transition to Countdown.
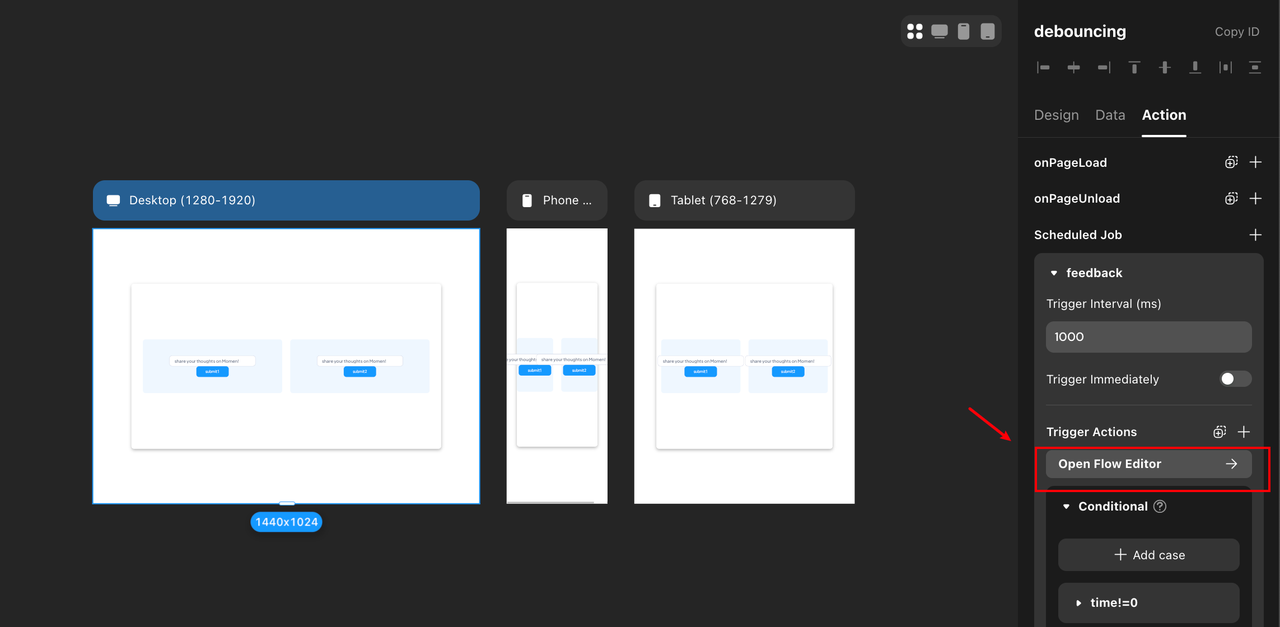
We'll need to create a countdown action on the page, and set the trigger interval as 1000ms.
Configure the countdown on the page.
Add a Bigint variable to the page's data (page_data) with a default value of 10 (for a 10-second countdown).
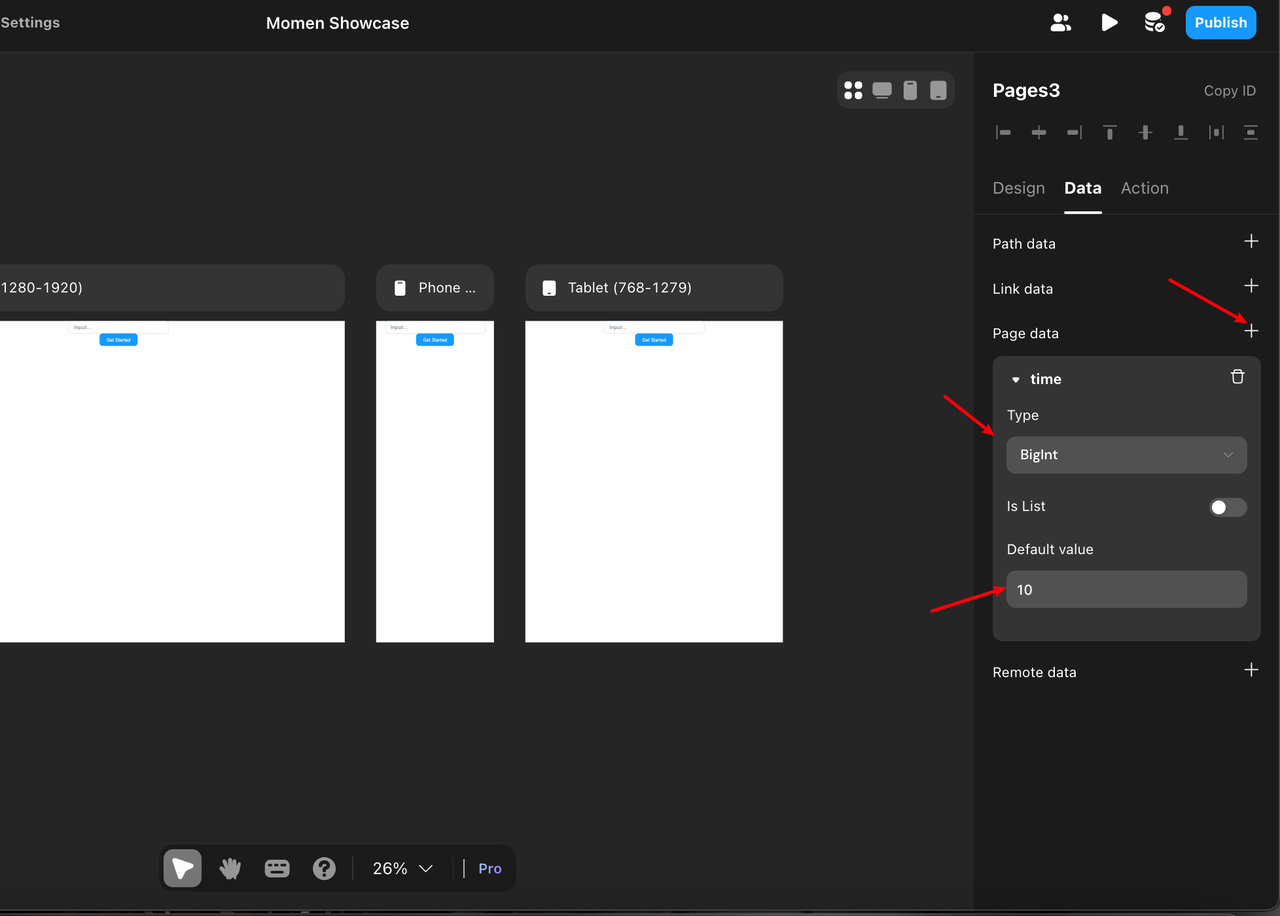
Display this variable dynamically on the Countdown button. Select the button under countdown case, bind the page data to the content. Use an interval trigger to decrement page_data every second (1000ms). Once page_data reaches 0, reset the button state to Submit.
For complex logic, use the Flow Editor to configure actions directly. Bind this logic only to the Submit button (other cases do not require actions).
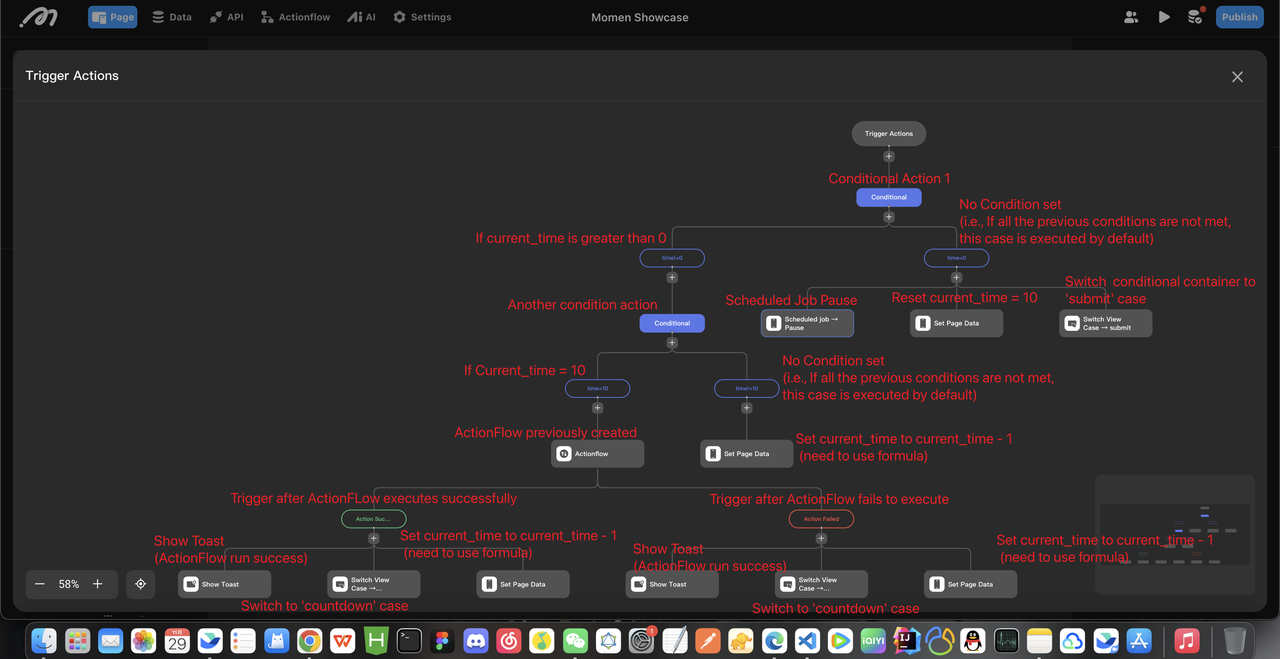
Please note that if you didn't configure the conditions for the case, the default case will be the first one in the left side bar. So please make sure your order is correct.
Testing
Use Mirror or Preview to test the setup. Adjust Actionflow permissions if needed.
Conclusion
Incorporating debounce functionality in your web app helps improve both performance and user experience, especially in cases where repeated actions (like multiple button clicks) can cause issues. By using a countdown action, conditional container, and Actionflow, you can easily prevent unwanted repetitive submissions, like those from a "Submit" button in a form. This simple yet effective method ensures that actions are only triggered once within a set time, keeping your app efficient and reliable.
