How to Implement Permissions in Your Application
Managing permissions is one of the most critical aspects of building secure and robust applications. Without proper control, users could perform unauthorized actions like creating orders with incorrect prices or accessing sensitive data that doesn't belong to them. In this tutorial, we'll dive deep into setting up a comprehensive permission system in Momen that ensures users have access only to what they should, and no more.
This tutorial is designed to be easy to follow and practical, focusing on role-based permissions and row-level security (RLS) to control user access effectively. Whether you're developing a course platform, an e-commerce site, or any system that requires user-specific data control, the principles shared here will be invaluable.
If you are interested, watch this video for more details:
Why Permissions Matter
Imagine a system where users can create purchase orders on their own, without any validation. Someone could potentially create an order for a product priced at $25 but pay only a penny. This kind of loophole can cause serious financial and operational issues.
Permissions help us avoid such scenarios by tightly controlling what actions users can perform and what data they can see or modify. In Momen, we achieve this by combining two core concepts:
Role-Based Permissions: Assigning permissions based on the role of a user, such as admin, editor, or regular user.
Row-Level Security (RLS): Restricting access to specific rows in a database table based on the user's identity or role.
We'll use our online course platform as an example and explore how to implement these effectively.
Role-Based Permissions and Row-Level Security Explained
Role-based permissions define what a user role can do at a high level. For example, an admin might have full control, while a regular user has limited access. However, role-based permissions alone are often not enough when you want to restrict access to specific records within a table. That's where row-level security (RLS) comes in.
RLS allows you to apply filters on data queries so that users only access rows they are authorized to see. For example, a user should only be able to view their own account details, not those of other users.
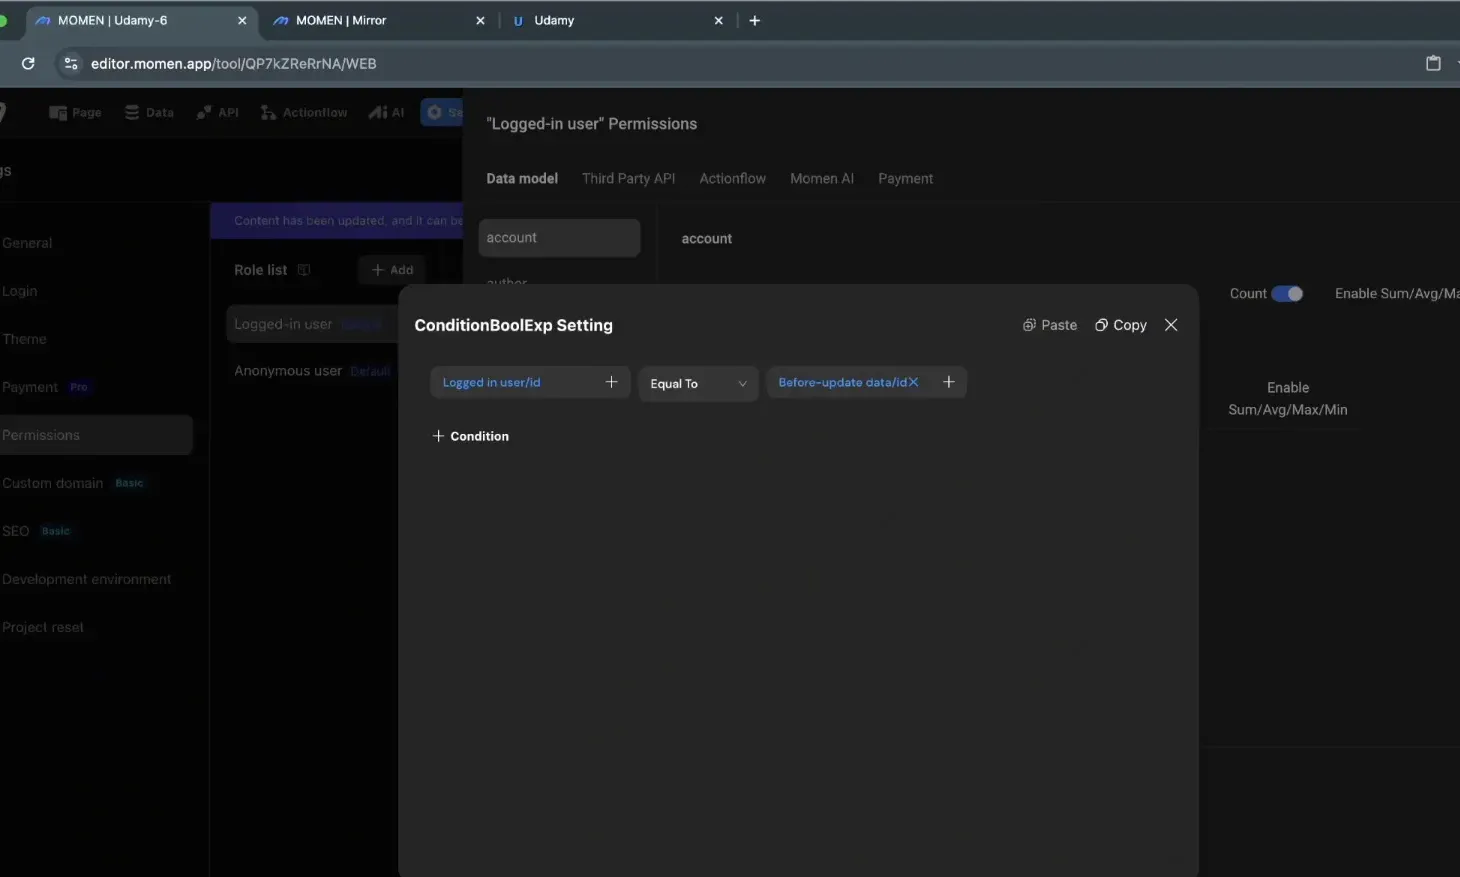
In practice, this means combining permissions with filters such as "logged in user's ID equals the record's owner ID" to enforce strict data access control.
Setting Permissions for Each Table
Let's break down how to configure permissions for different tables in a typical course purchase system. We will cover what users should be able to do depending on whether they are logged in or not.
Account Table
The account table contains user information. Generally, users should only have read access to their own accounts and limited editing rights to prevent unauthorized changes.
Read: Allow users to read only their own account data. This is enforced via a filter where the logged-in user's ID equals the account ID.
Edit: Users should not be able to change sensitive fields such as username, email, or phone number directly through the app. Editing should be restricted to their own account only.
Aggregate Functions: Counting or averaging accounts is usually unnecessary for regular users and can be disabled.
Authors Table
Authors are usually system-wide data that do not require user modification.
No create, edit, or delete permissions for regular users.
Read access can be open since author information is generally public.
Message Content and Conversation Tables
These tables are typically used for system-generated data, such as AI interactions or internal messaging. They should be fully restricted for regular users.
No read, create, update, or delete permissions.
These tables are purely backend and not user-facing.
Account Has Course Table
This table tracks which courses a user has access to. It is critical to restrict creation or modification to prevent unauthorized course enrollments.
No create, edit, or delete permissions for users directly.
Users may have permission to count rows to display information such as the number of learners enrolled in a course.
Course Table
Courses are typically created and managed by admins. Regular users should not have permissions to create, edit, or delete courses.
Read access can be granted to all users to browse available courses.
Aggregate permissions like count or max can be enabled if needed for displaying stats.
Category Table
Categories help organize courses and are generally static data managed by admins.
Users can have read access to view categories.
No create, edit, or delete permissions for users.
Purchase Order Table
This is one of the most sensitive tables as it involves financial transactions.
Read: Users should only be able to view their own orders. This is enforced with a filter where the logged-in user's ID equals the purchaser's ID.
Create: Creation of purchase orders should be tightly controlled through an Actionflow triggered by payment callbacks, rather than allowing users to create orders directly. This prevents manipulation of order prices or details.
Delete: Disabled for users to prevent tampering with purchase records.
Aggregate Functions: Counting and summing can be enabled if needed for reporting.
Payment Records Table
Payment records are also sensitive and should be protected.
Users can have read access only to their own payment records, enforced by row-level security.
No create, edit, or delete permissions for users.
Recurring Payments and Refund Tables
If your system does not handle recurring payments or refunds yet, it's best to disable all permissions related to these tables to maintain security.
Actionflows
Actionflows are predefined automated processes. Users should only be allowed to trigger specific action flows relevant to them, such as creating an order for themselves.
Only allow users to create orders via the "create order" action flow.
Enforce that the account ID in the order matches the logged-in user's ID.
Disable all other Actionflows for regular users.
Setting Permissions for Logged-Out Users
Users who have not logged in should have the most restricted access. Their permissions are usually limited to viewing public data only, such as authors, courses, and categories.
No read or edit permissions on account or purchase order tables.
Read access allowed for public-facing data like authors, courses, and categories.
No permissions to create, update, or delete any data.
Count permissions can be enabled if necessary for displaying public statistics.
Practical Tips for Implementing Permissions
Here are some practical tips to keep in mind when configuring your permission system:
Always trust backend data over frontend input. Never rely on client-side data for critical values like prices or order amounts. Instead, fetch these values from your database during order creation.
Use row-level security filters consistently. Make sure that any user-specific data access is protected with filters comparing the logged-in user's ID to the data's owner ID.
Keep system tables fully restricted. Tables used for internal processes or AI should be inaccessible to regular users to maintain integrity.
Test permissions thoroughly. After setting permissions, try accessing data as different user roles to verify that restrictions are working as expected.
Conclusion
Setting up a robust permission system is essential for protecting your application and its users. By carefully combining role-based permissions with row-level security, you can ensure that users only access and manipulate data they are authorized to handle.
Remember, the goal is to create a seamless yet secure experience where users can perform their intended actions without risking data integrity or security breaches. If you follow the principles outlined in this tutorial, you will be well on your way to building a safe and trustworthy application.