How to build dynamic multi-choice forms for quizzes and surveys in Momen
Introduction
Want to connect with your audience, gather valuable feedback, or just add a bit of fun to your website? Interactive quizzes and surveys are a fantastic way to boost engagement and learn more about your users.
This tutorial will guide you through creating a dynamic, multiple-choice form in Momen, suitable for building quizzes or surveys in your app.
Key Component
Select view is the key component in building this function. It handles displaying options and indicates selected states.
Step-by-Step Guide
Data Model
We need to create a question table and an answer table to store our questions and options.
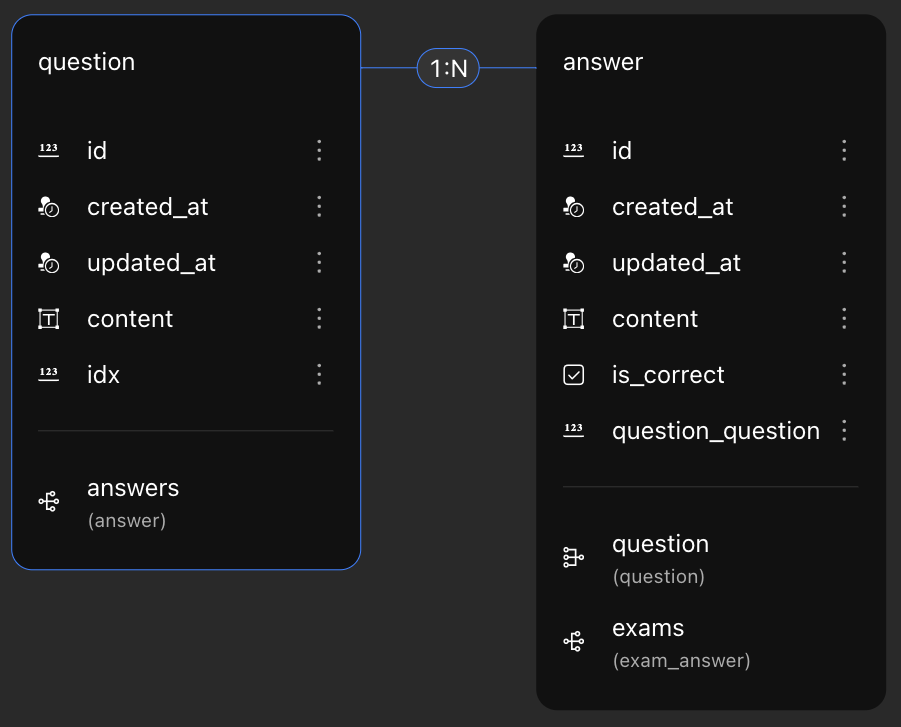
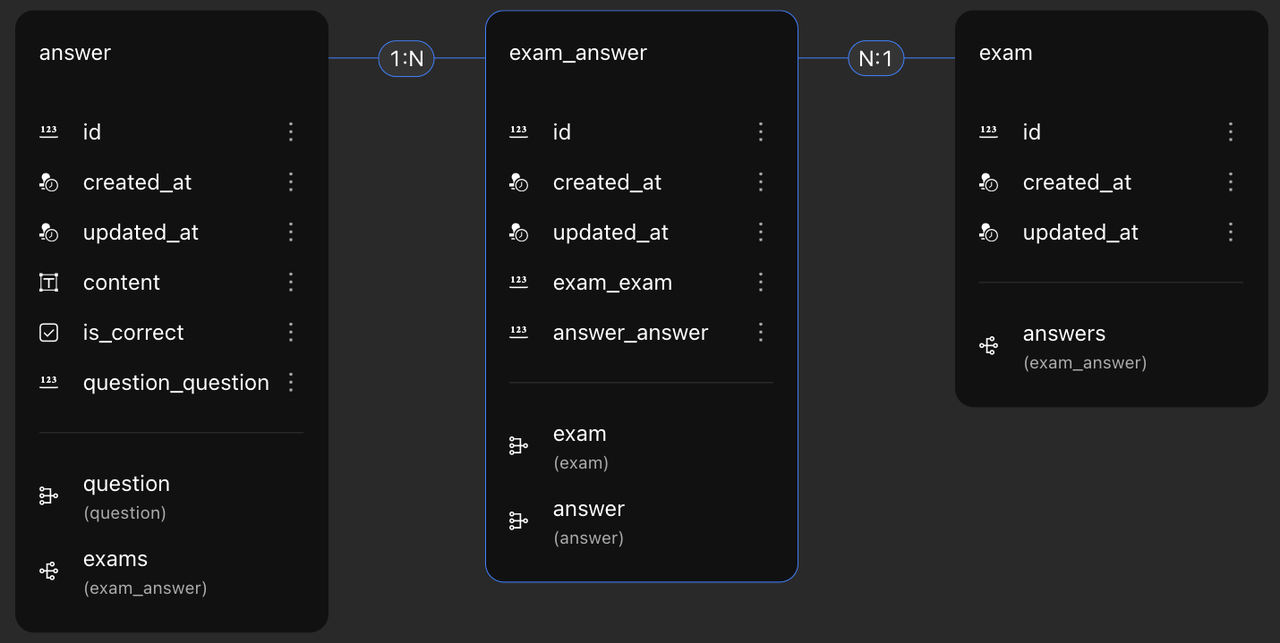
For user's answer, we need to create an exam table to store their records and the details of their answer.
Exam: Store each records of user's participation.
Exam_answer: Store the options that user selected.
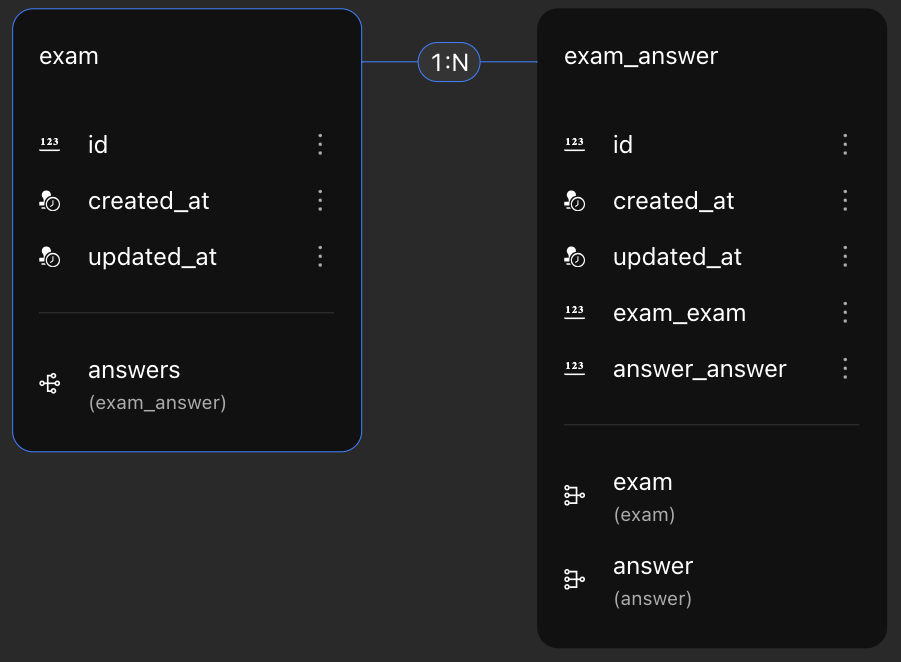
Relationship: Create a 1:N relationship between answer and exam_answer table. This allows you to retrieve user's selected options.
Page Configuration
Page Variables: Create two page variables to manage the quiz flow:
exam_id: This will store the unique ID of the current quiz attempt (from theexamtable).question_item: This will keep track of the current question number (starting at 1).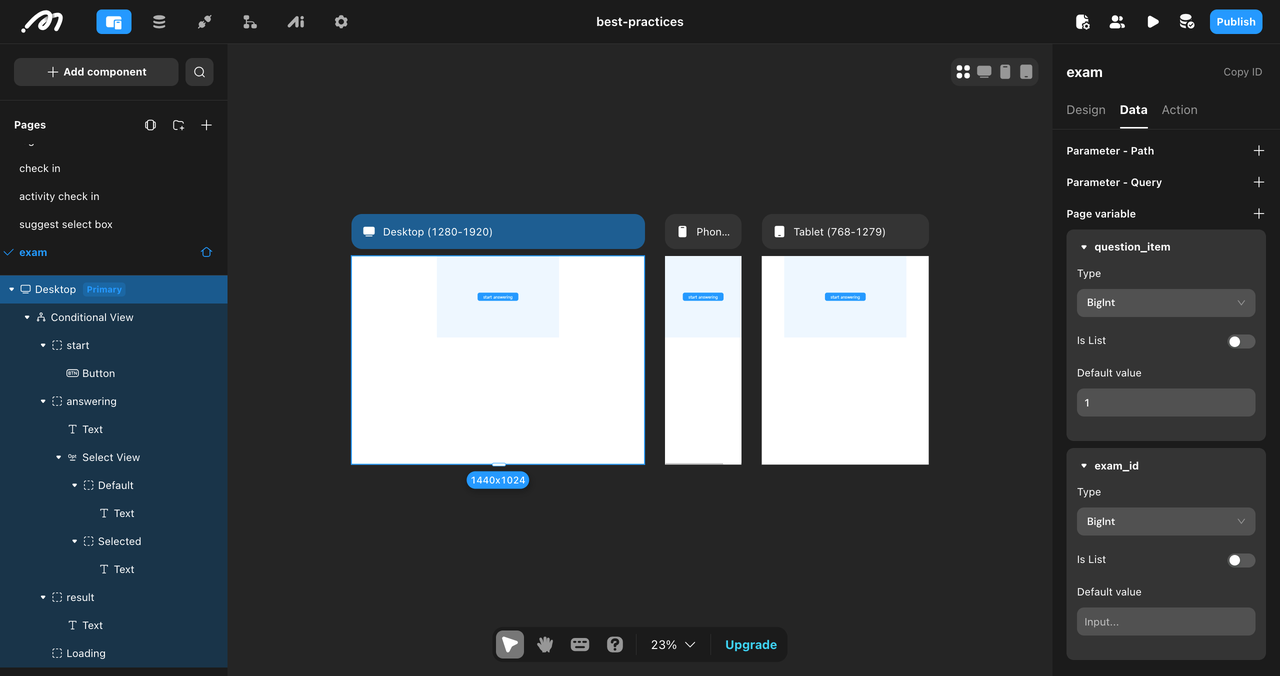
Conditional View: We'll use conditional view to control which part of the quiz is displayed at any given time.
Create a main container.
Inside the main container, create three child containers:
Start: This container will hold the "Start Quiz" button.In Progress: This container will display the current question and its options.Results: This container will show the final score or results.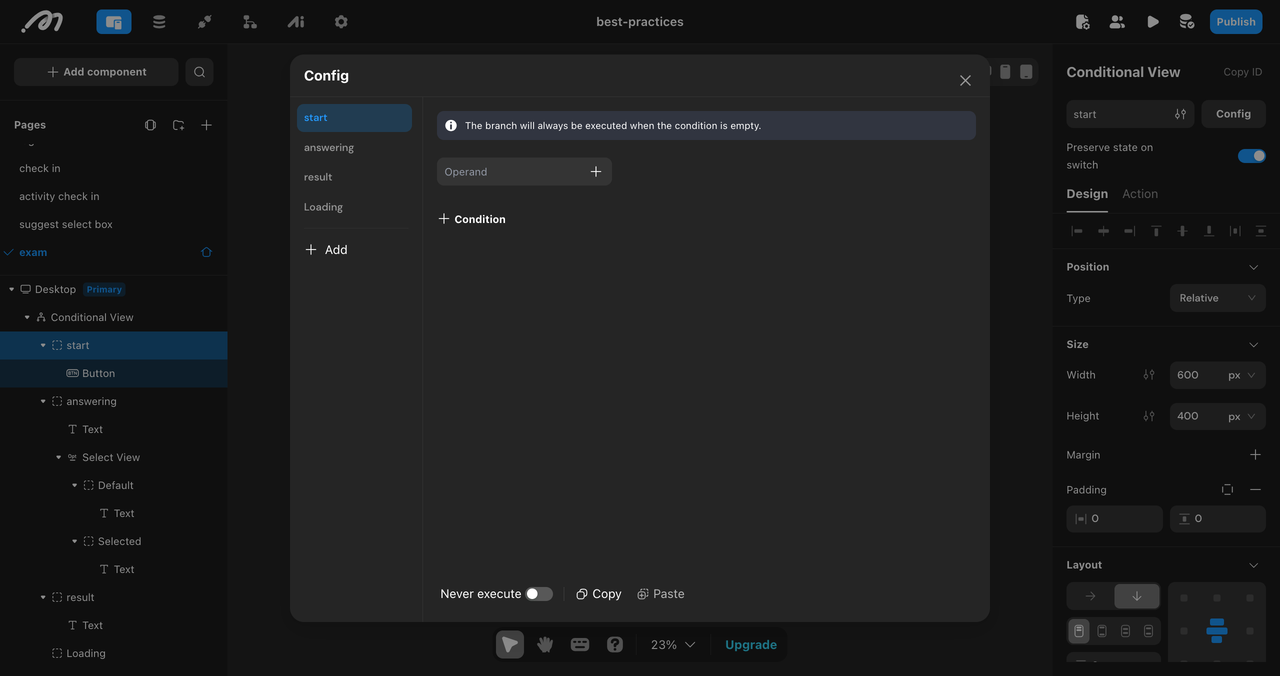
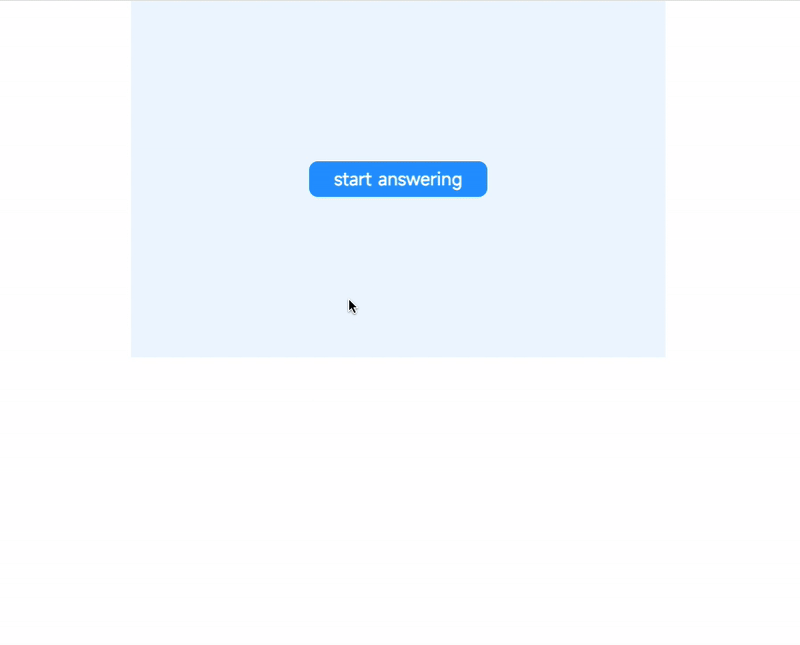
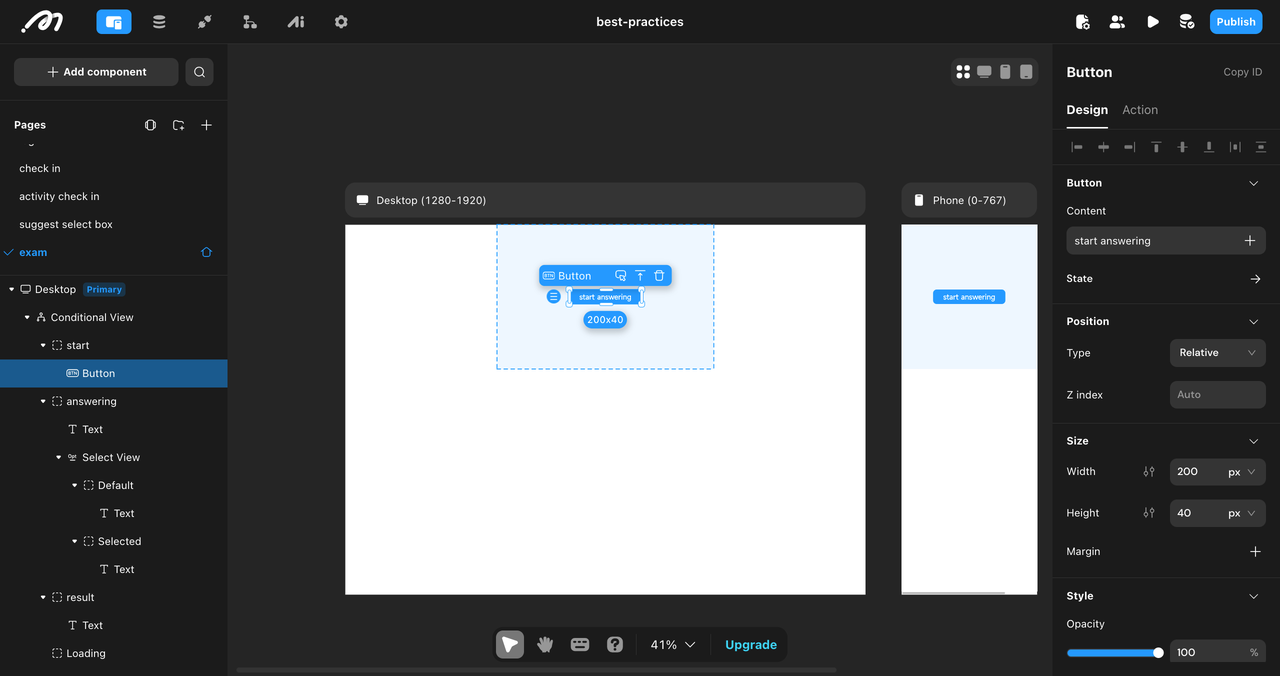
StartContainer Configuration:Add a Button component to this container.
Set the button text to "Start Quiz".
Style the button (e.g., color, size, font).
Button Action: Configure the button's "On Click" action:

Create Record: Add an action to create a new record in the
examtable.On Success: After the record is successfully created:
Set Page Variable: Set the
exam_idpage variable to theresult dataof the newly created record.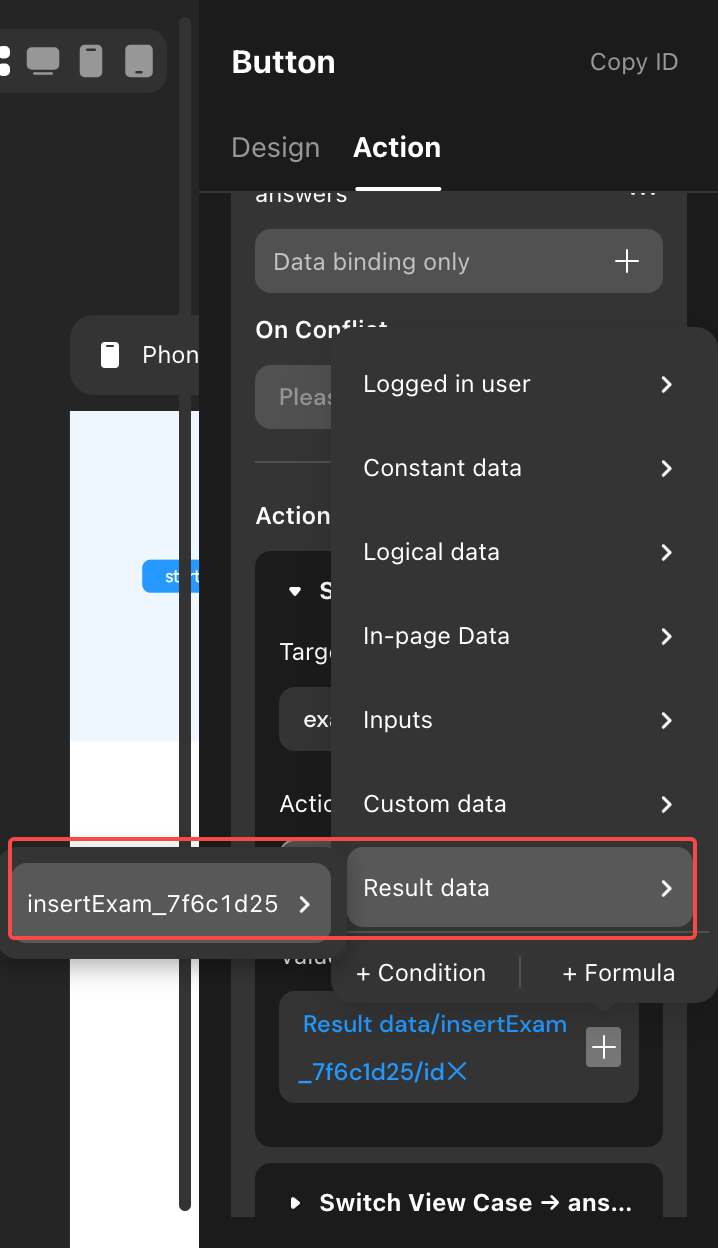
Switch View: Change the displayed container to the
In Progresscontainer.
AnsweringContainer Configuration:
Data Source: Add a data source that retrieves data from the
Questionstable.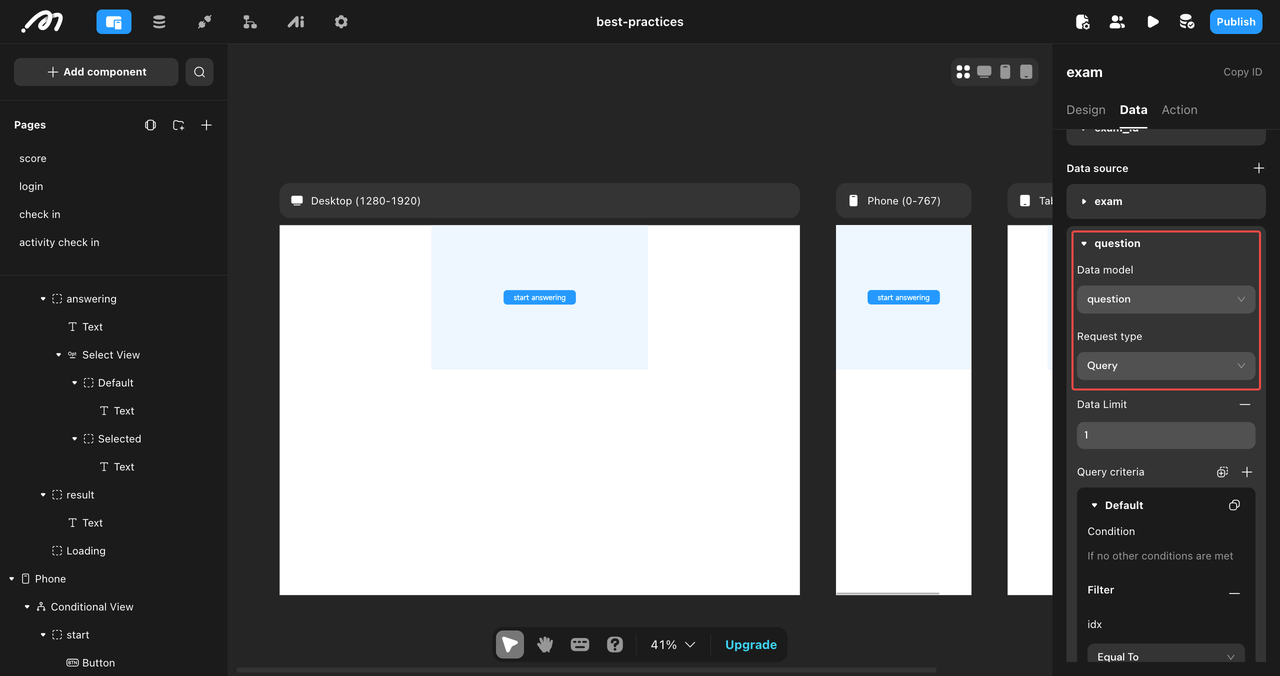
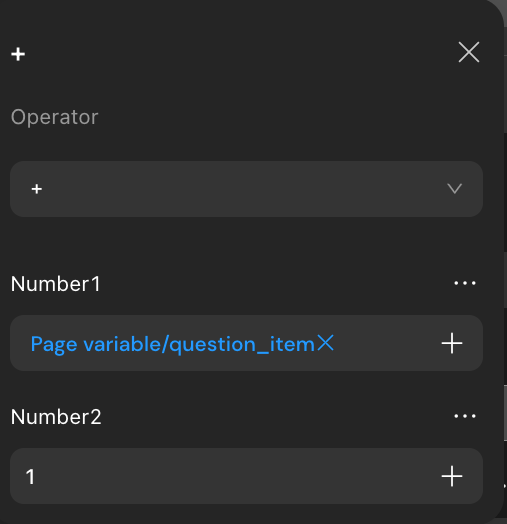
Filter: Filter the data to show only the question where
idis equal to thequestion_itempage variable. This ensures that only the current question is displayed.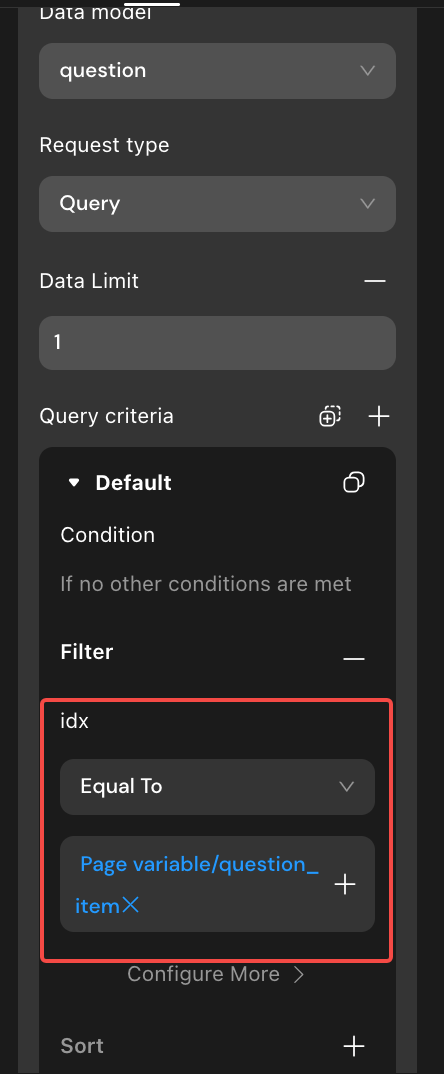
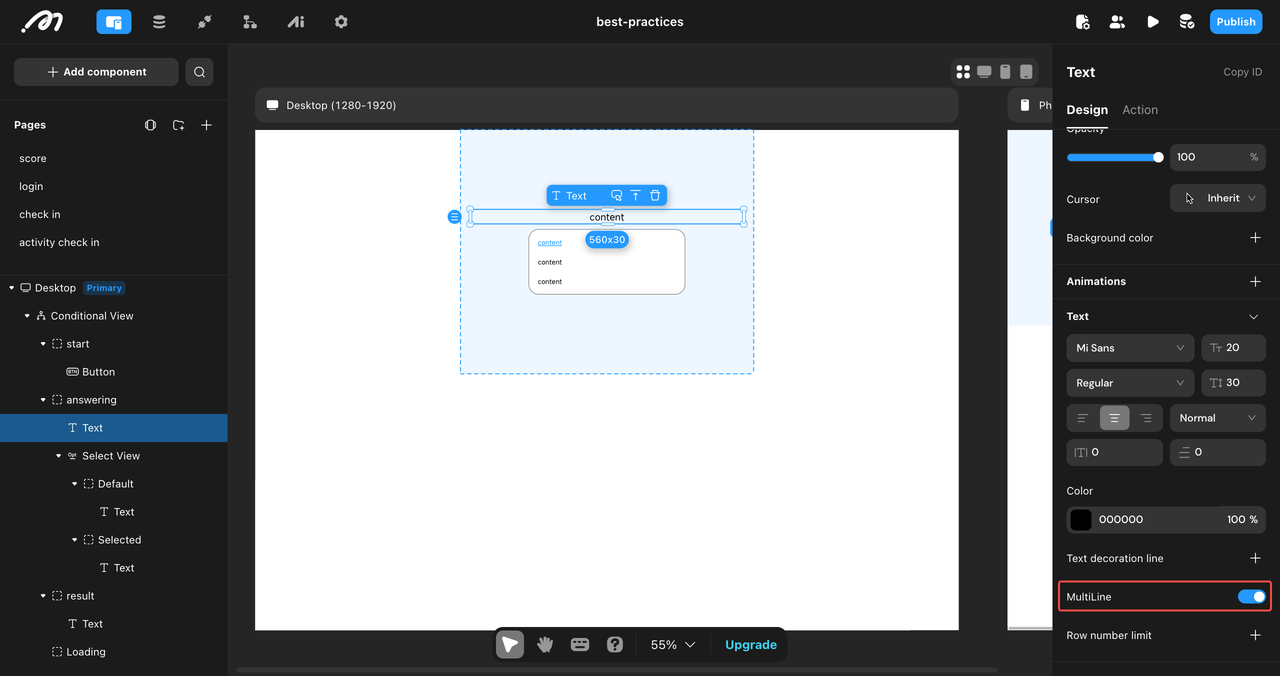
Display Question Text: Add a Text component to display the question.
Content: Set the text content to display the
contentfrom theQuestionsdata source.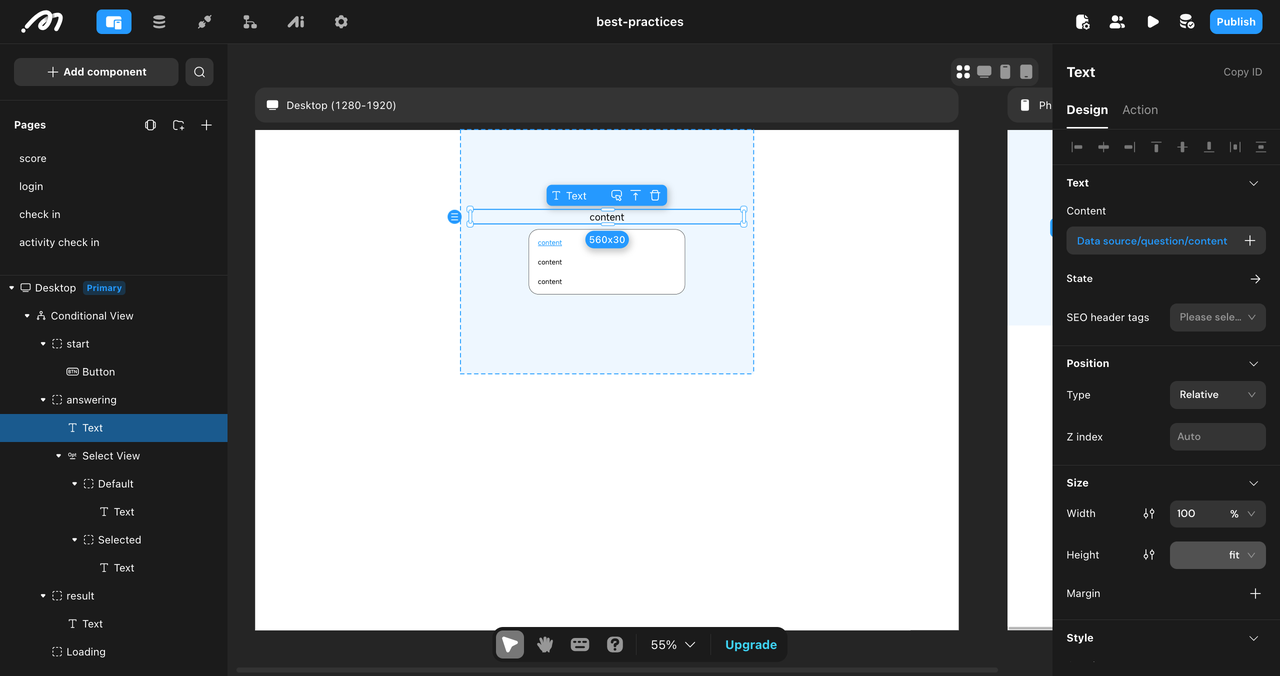
Style: Style the text appropriately and turn on the multi line option.
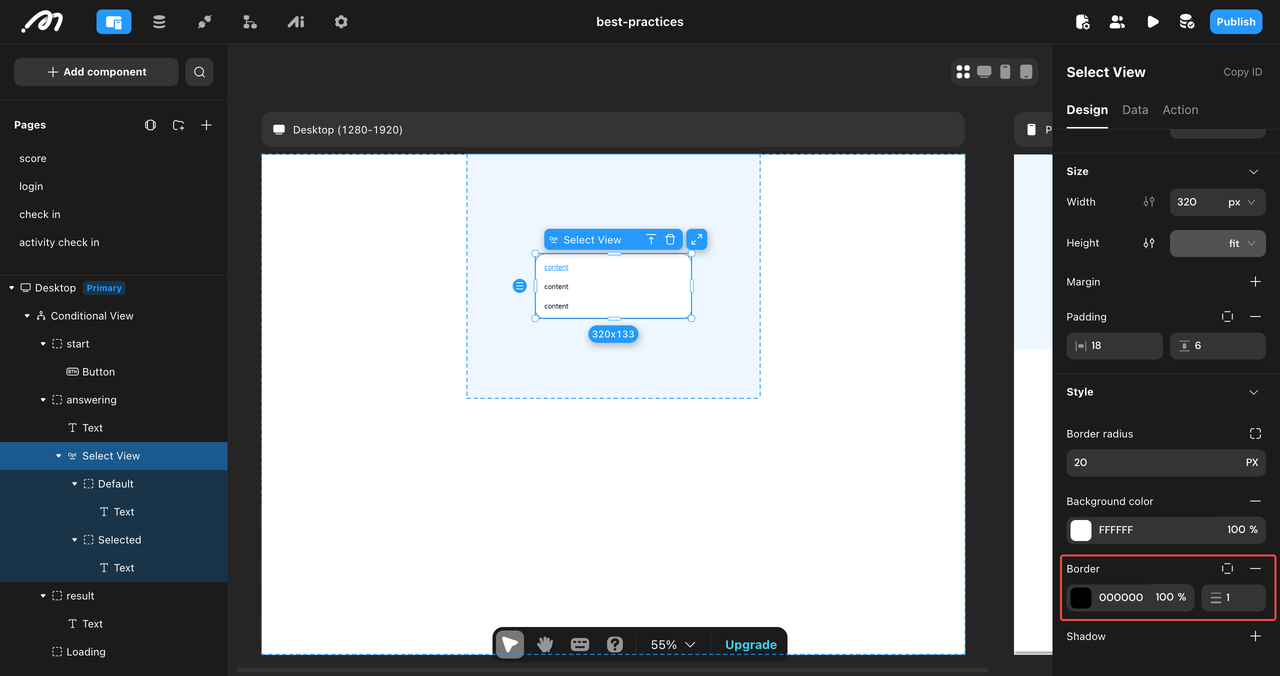
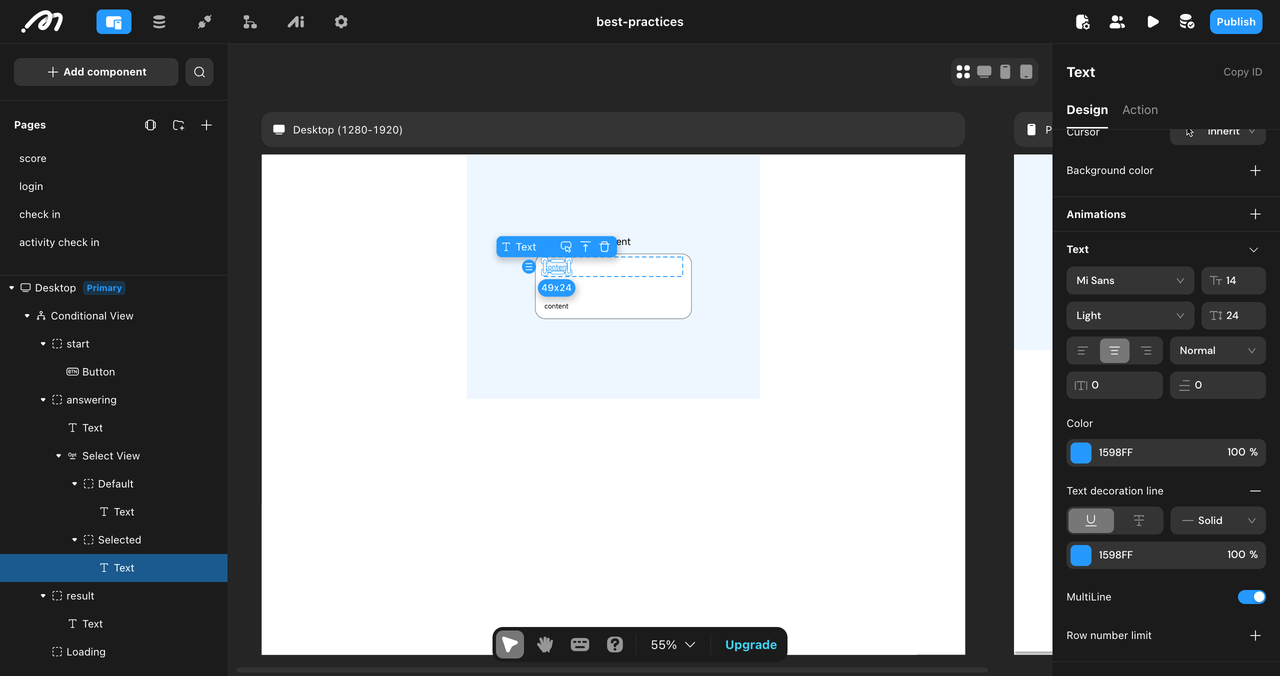
Display Options: Add a Select View component to display the answer options.
Design:
Enable "Multi-line" for option text (to handle longer options).

Optionally, add borders or other styling to improve the visual appearance.
Data:
Data Source: Set the data source to the
answertable.Filter: Filter the options to show only those where
question_questionmatches thequestion_idfrom the current question (obtained from theQuestiondata source).
Action (On Click): Configure what happens when a user clicks on an option:
Create Record: Add an action to create a new record in the
exam_answertable.Set
exam_examto the value of theexam_idpage variable.Set exam
answer_answerto theidof the selected option (provided by the Select View component).
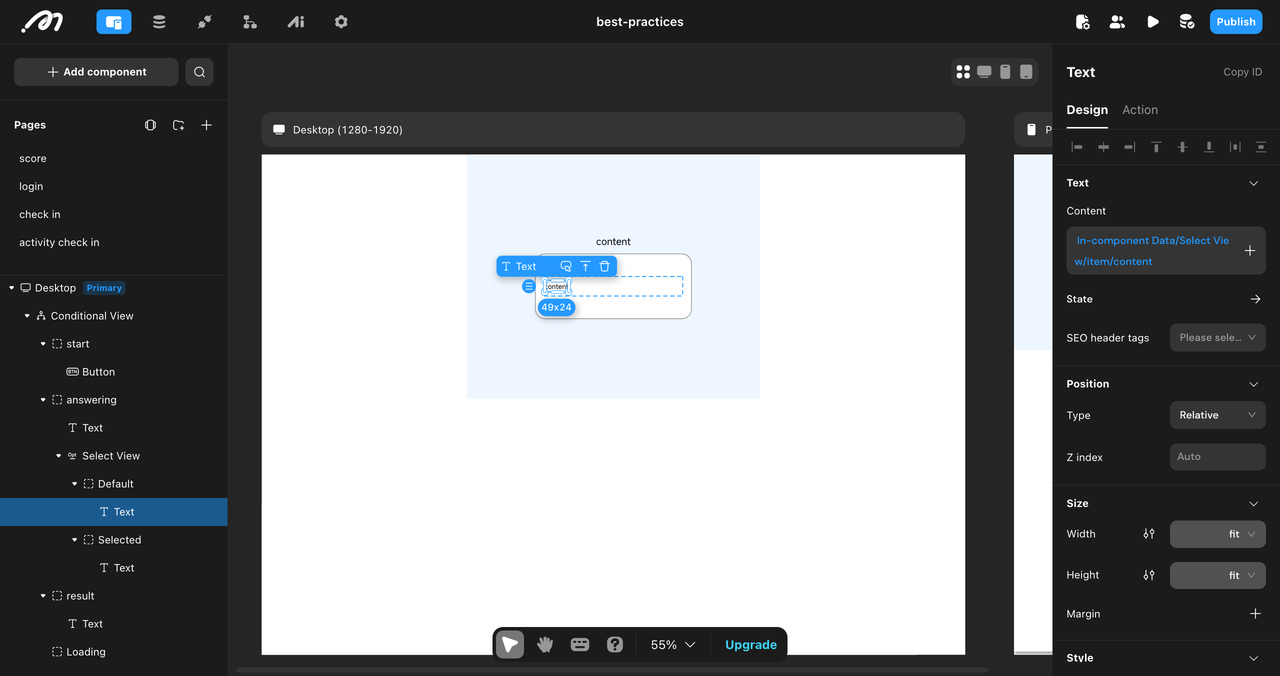
Default state view:
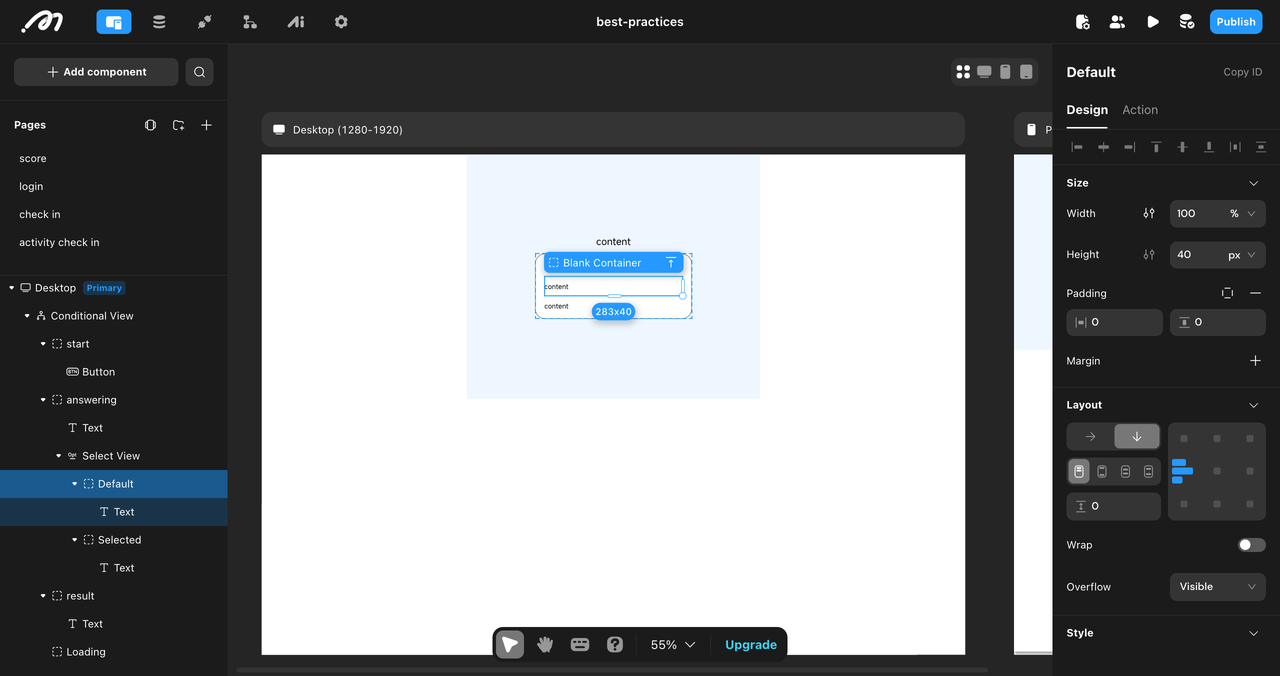
Add a text, set content to
item/contentfrom the Select View.
Set the width to 100%, enable multi-line.

Selected state view:
The same as default state, but change the text color.
ResultsContainer Configuration:Data Source: Add a data source that retrieves data from the
examtable.Filter: Filter the data to show only the attempt where
idis equal to theexam_idpage variable.
Update Score : Go back to the
answeringcontainer and the Select View'sInsert dataaction. Add aRefresh Pageaction after creating theexam_answerrecord. This ensures that the score is updated after each question is answered.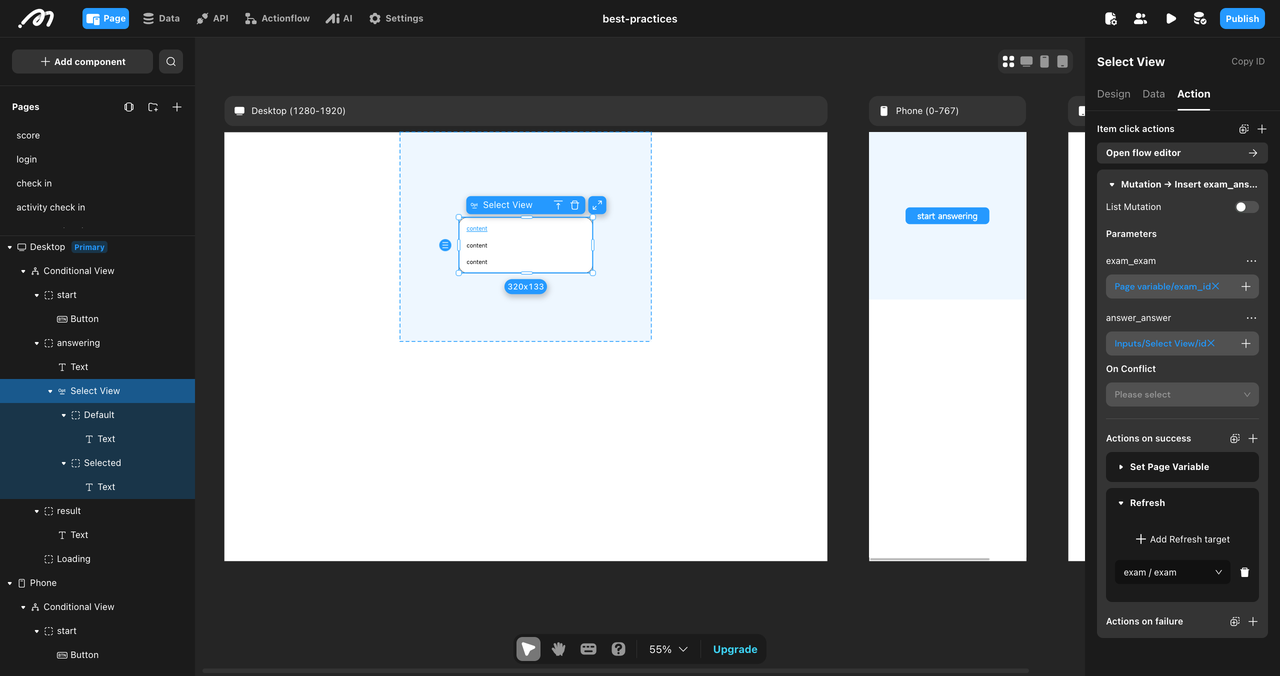
Show Results: We need to automatically switch to the
Resultscontainer when the quiz is finished. Go back to theQuestiondata source. Add an When Success condition:Condition: Check if the
Questiondata source is empty (meaning there are no more questions to display).Action: If the condition is true, switch the container to
result.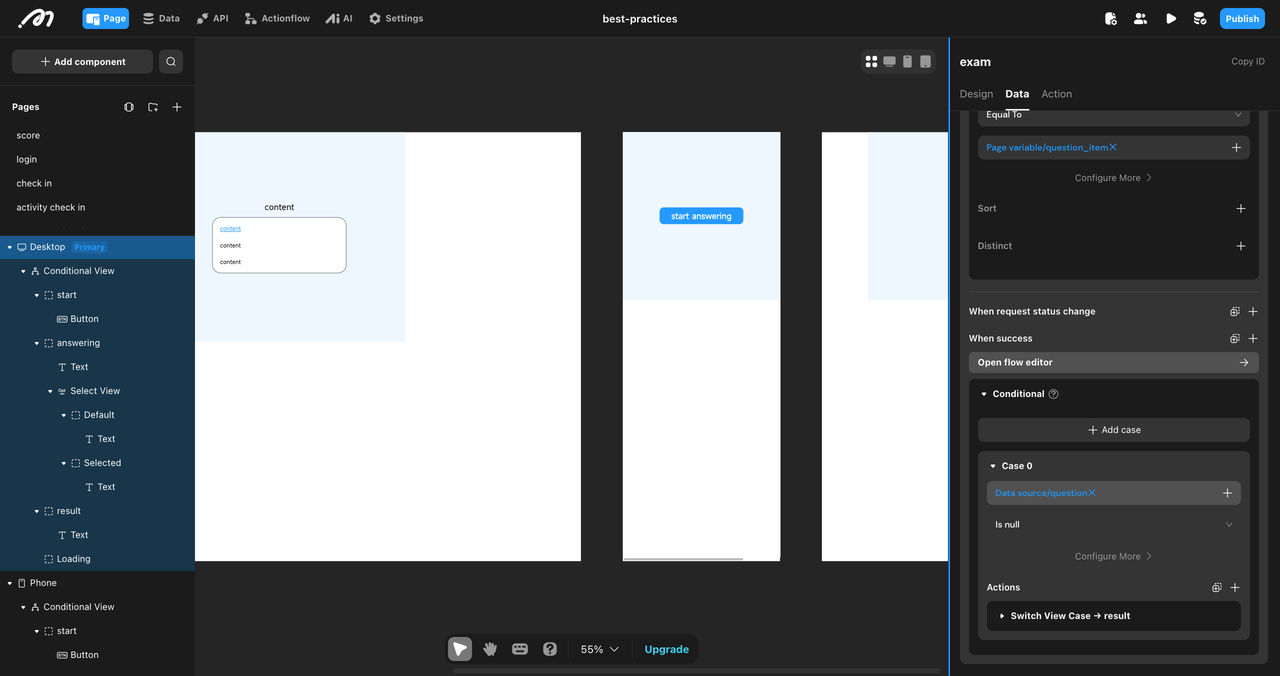
Content: Add a text component. Set the text content to:
Scorefollowed byIn Page Data - Data Source - exam - answers - count. Click oncountand configure a filter:answer/is_correctisTrue
Resources
You can check our video tutorial for this project: https://youtu.be/d3f53WZ-FZ4
We just released our comprehensive courses. Learn to build a web app step by step here.