How to build a check-in function in Momen
Introduction
The Check-In function in an event app helps streamline the registration process, verify attendee identities, and enhance overall engagement. Whether you're managing a remote team, organizing an event, or tracking personal milestones, this function allows you to efficiently record participation and monitor progress.
In this tutorial, we'll show you how to build a Check-In function in Momen. We'll start with an online check-in and then expand it to offline event check-ins with location and time-based conditions.
Prerequisite: Before you start, make sure you're familiar with the Login Function in Momen, as the Check-In function is tied to user authentication.
Key Component
Conditional view will be used in this project. It displays different content based on specific conditions.
Step-by-Step Guide
Part 1: Basic Online Check-In
Data Model
To ensure check-in records persist even after refreshing the page, we’ll store them in a database.
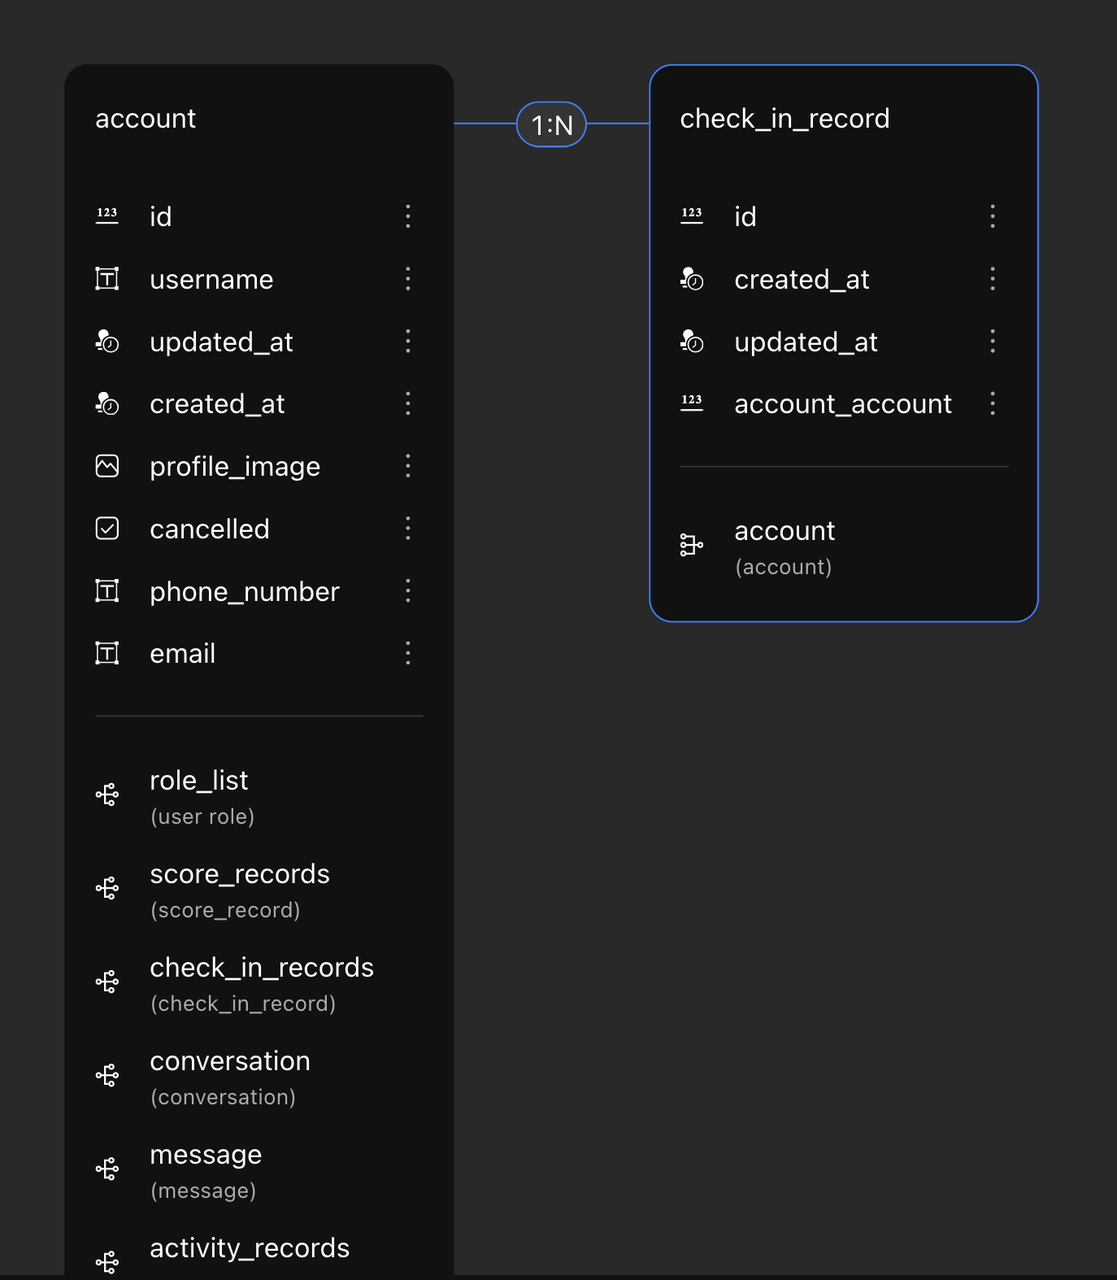
Create a table named
check-in-record.Since a user can have multiple check-ins, set up a 1:N relationship between
accountandcheck-in-record.
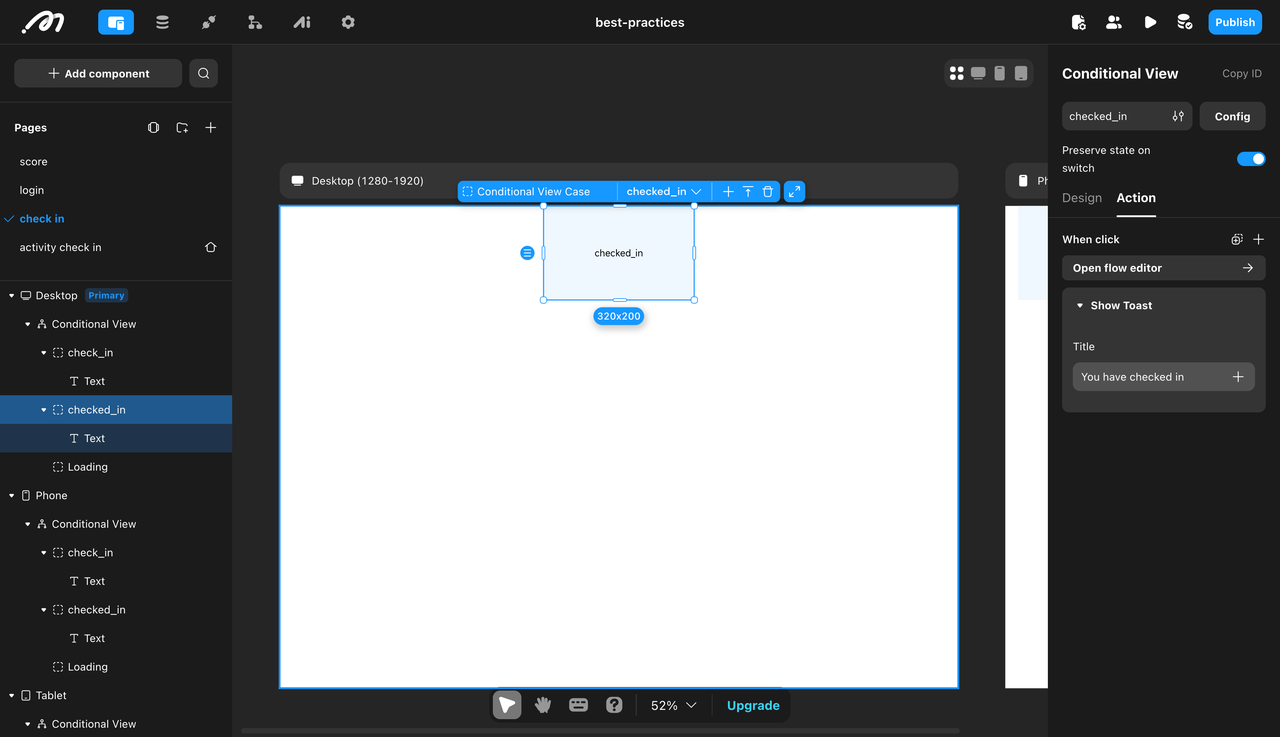
Configure the Conditional View
We’ll use a Conditional View to display different states based on whether the user has checked in.
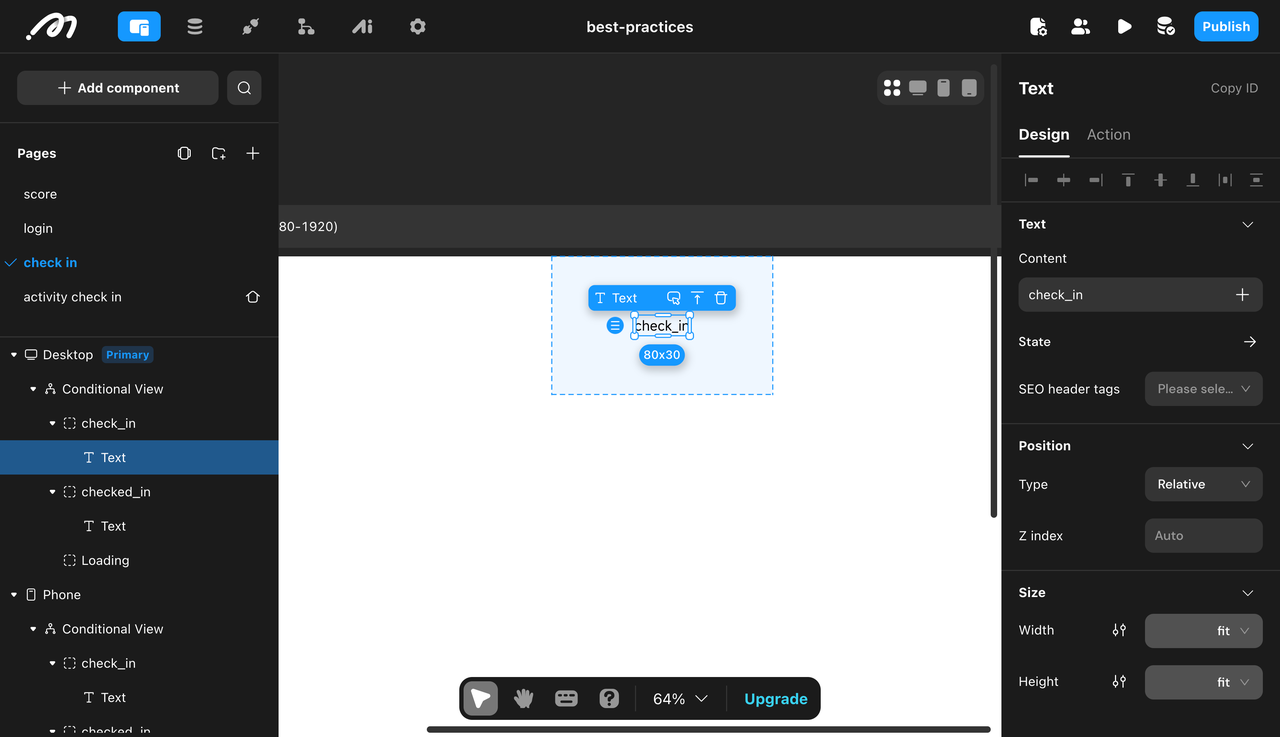
Add a conditional container and configure two conditional sub-containers, as shown in the image.
Configure text components for each conditional sub-container. For example:
When not checked in: Add a text component with the content [Check In].
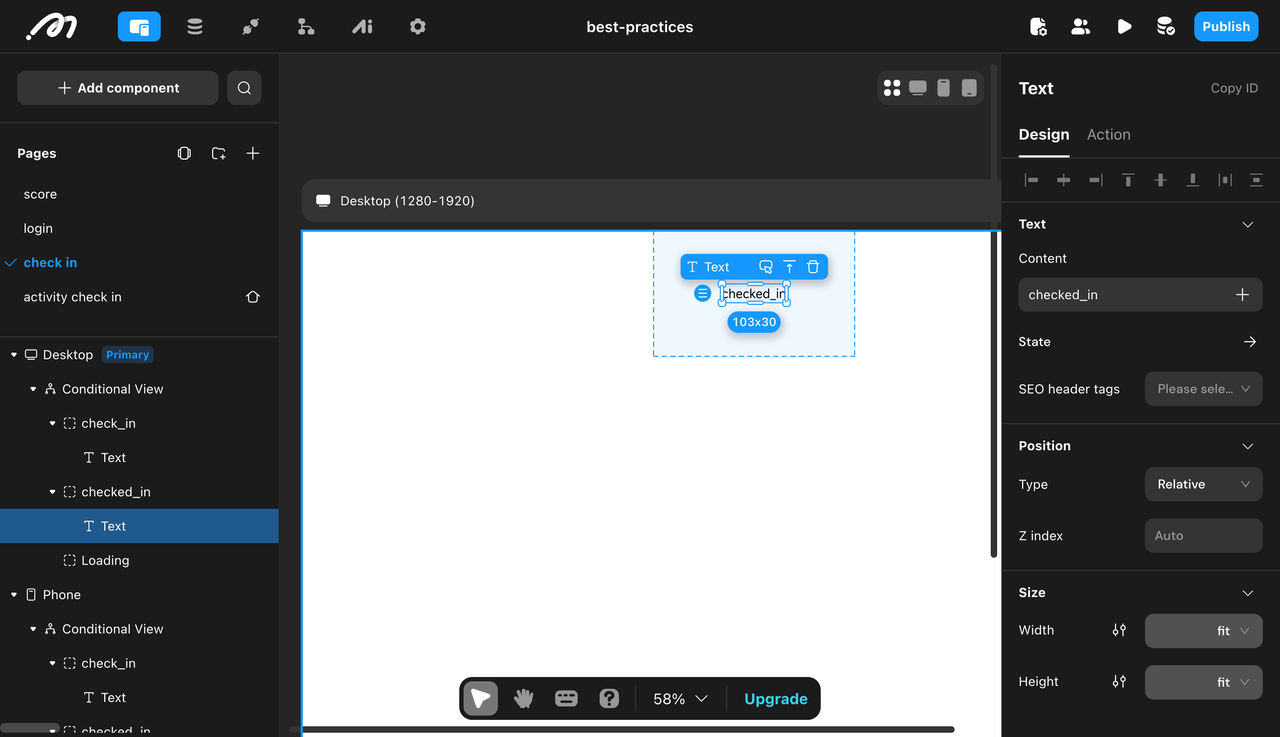
When already checked in: Add a text component with the content [Checked In].
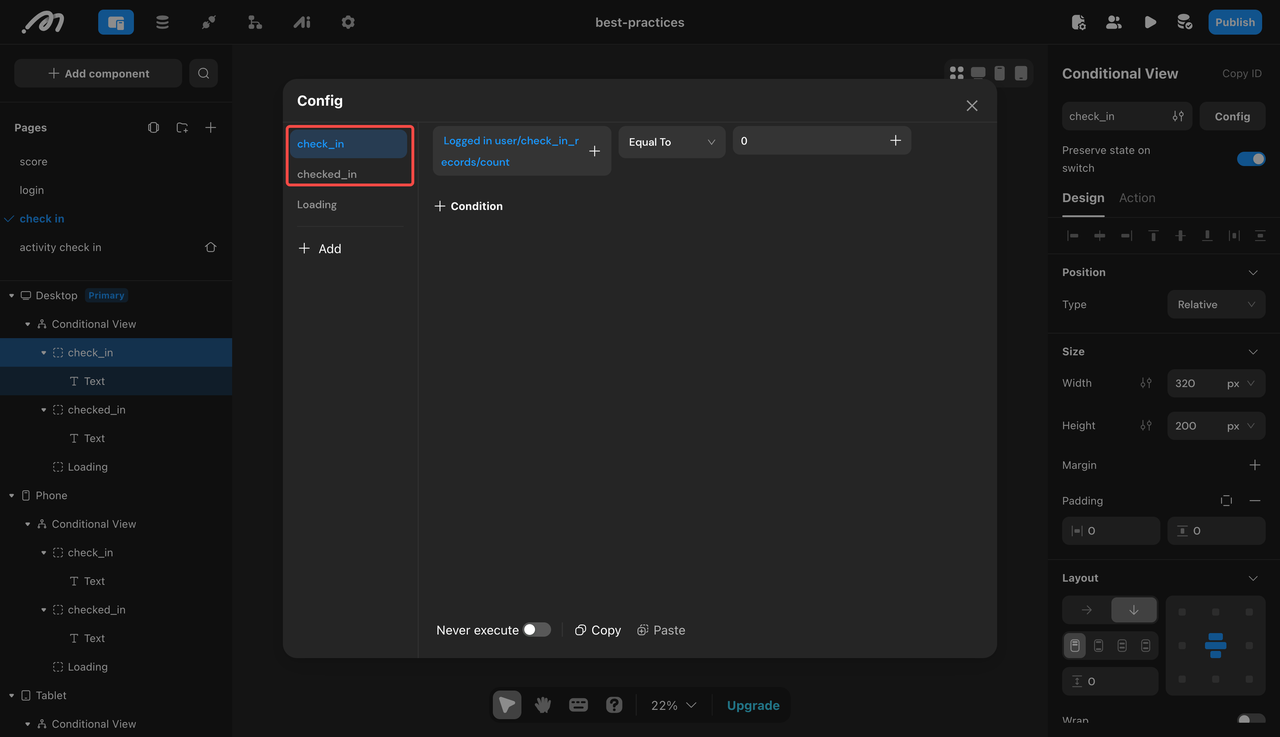
Condition Configuration
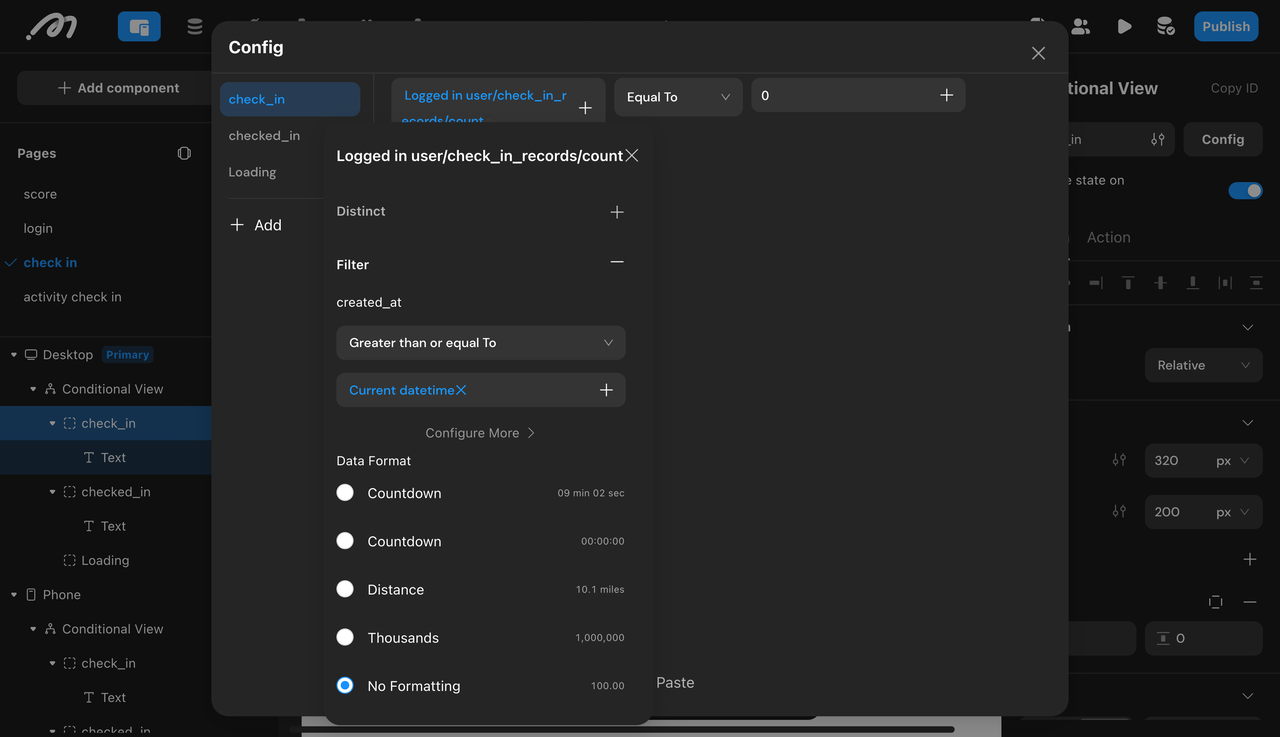
Select the "Not Checked In" conditional sub-container and set the condition:
The total number of check-in records for logged-in users today must be zero.
Filter the records to check if the creation date is on the current day (from 12 AM onward).
Action Configuration
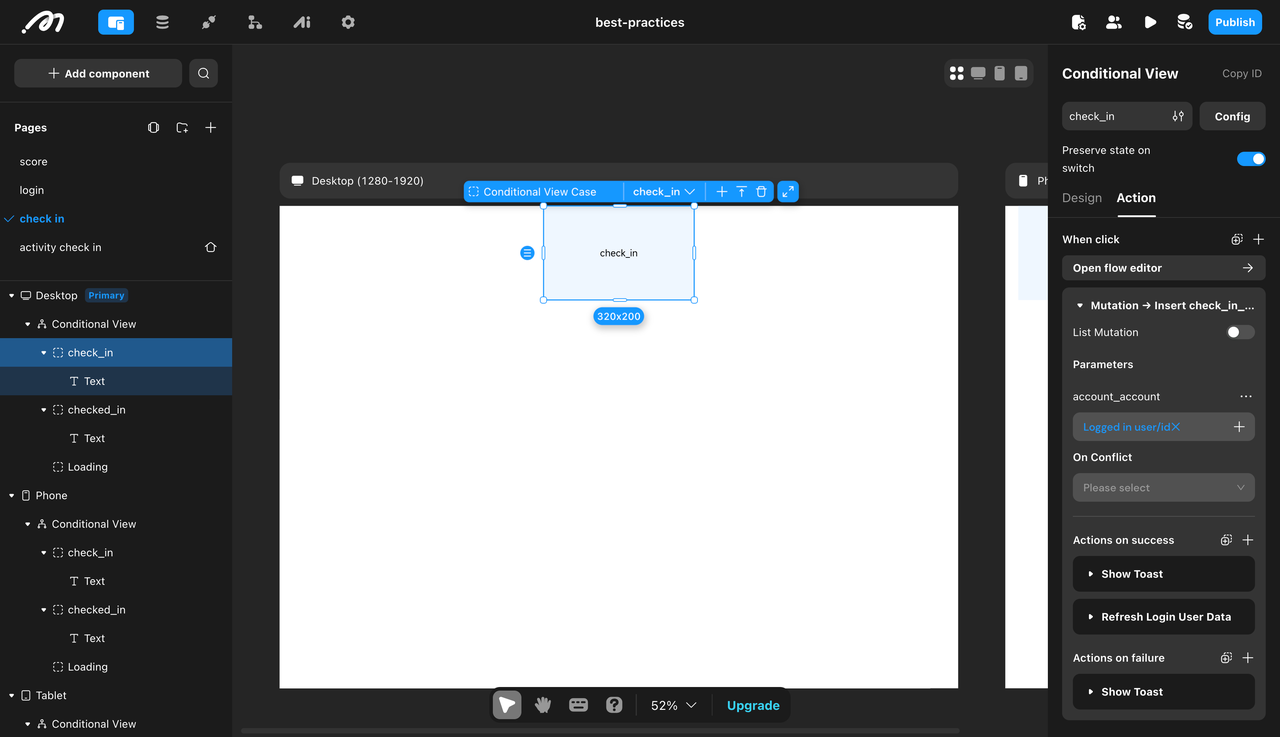
Select the "Not Checked In" conditional sub-container, add an action mutation - insert check-in record. Assign the parameter "User - Account" to the current user data - ID.
Configure the action for success and failure in the first step:
On Success:
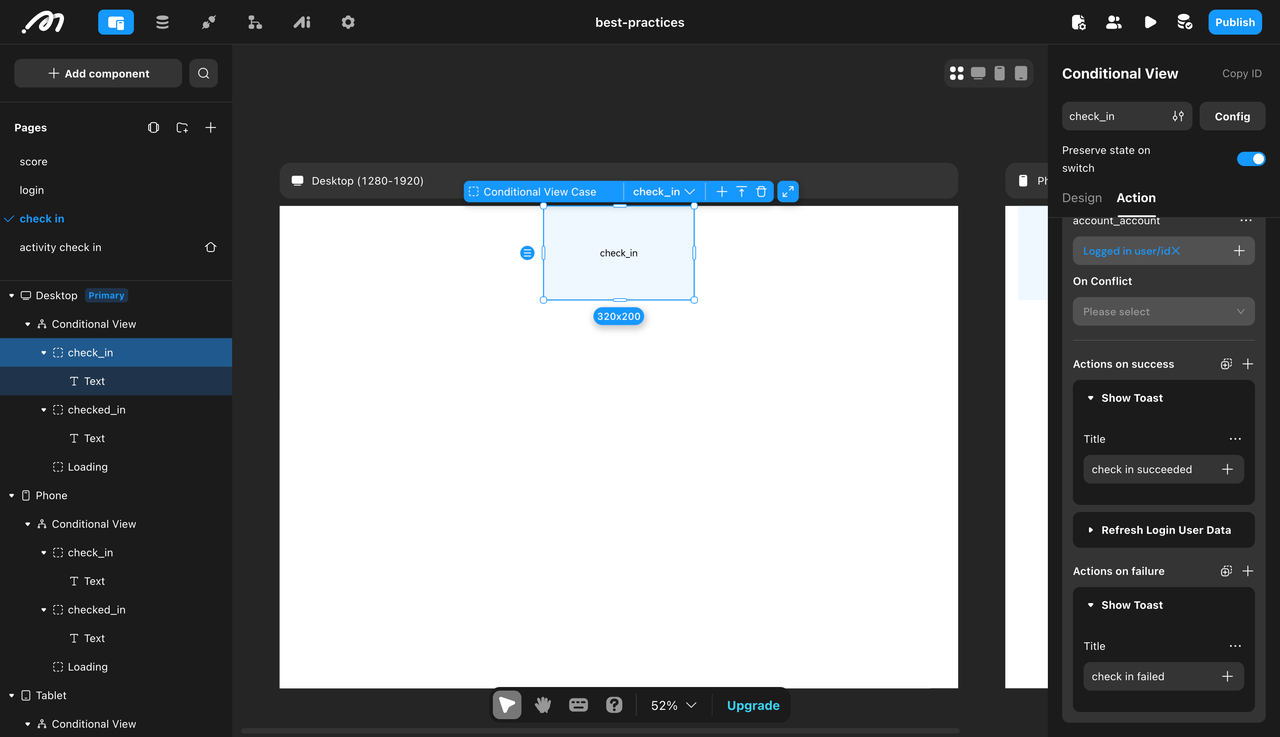
Configure an action to display a toast, with the parameter "Title" set to "Check-in Successful". This informs the user upon success, providing better feedback.
Configure an action to refresh the current user data. This updates the page with the latest user data from the database and displays the "Checked In" style.
On Failure: Configure an action to display a toast, with the parameter "Title" set to "Check-in Failed".
Select the "Checked In" case, configure a behavior to display a prompt, with the parameter "Title" set to "Checked In".
Part 2: Offline Event Check-In (With Time & Location)
Now, we’ll add time and location-based conditions to create an advanced event check-in system.
Defining Check-In Conditions
Before building, let's analyze the possible check-in states:
Scenario | Displayed Status |
User has already checked in | "Checked-In" |
Check-in time has passed | "Expired" |
Check-in time has not started | "Not Checked-In" |
Time reached, but user is outside the check-in area | "Distance Not Met" |
Time and location are valid | "Check-In Available" |
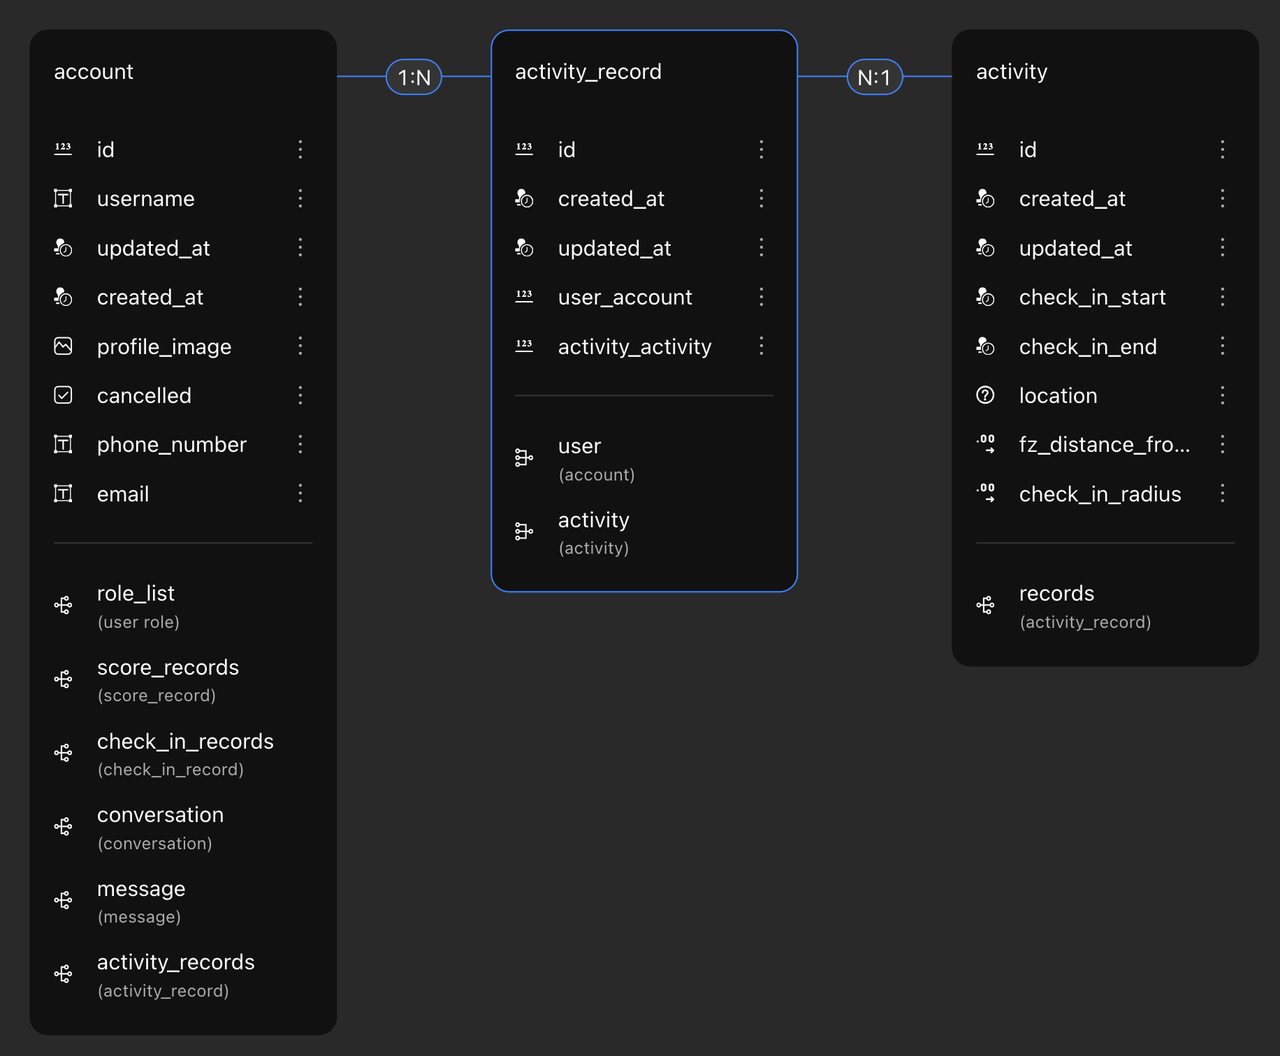
Data Model
Since the requirement is for offline event check-ins, an event table is needed to record the check-in start time, check-in expiration time, check-in location, and check-in range. Notably, the check-in location type should be latitude and longitude.
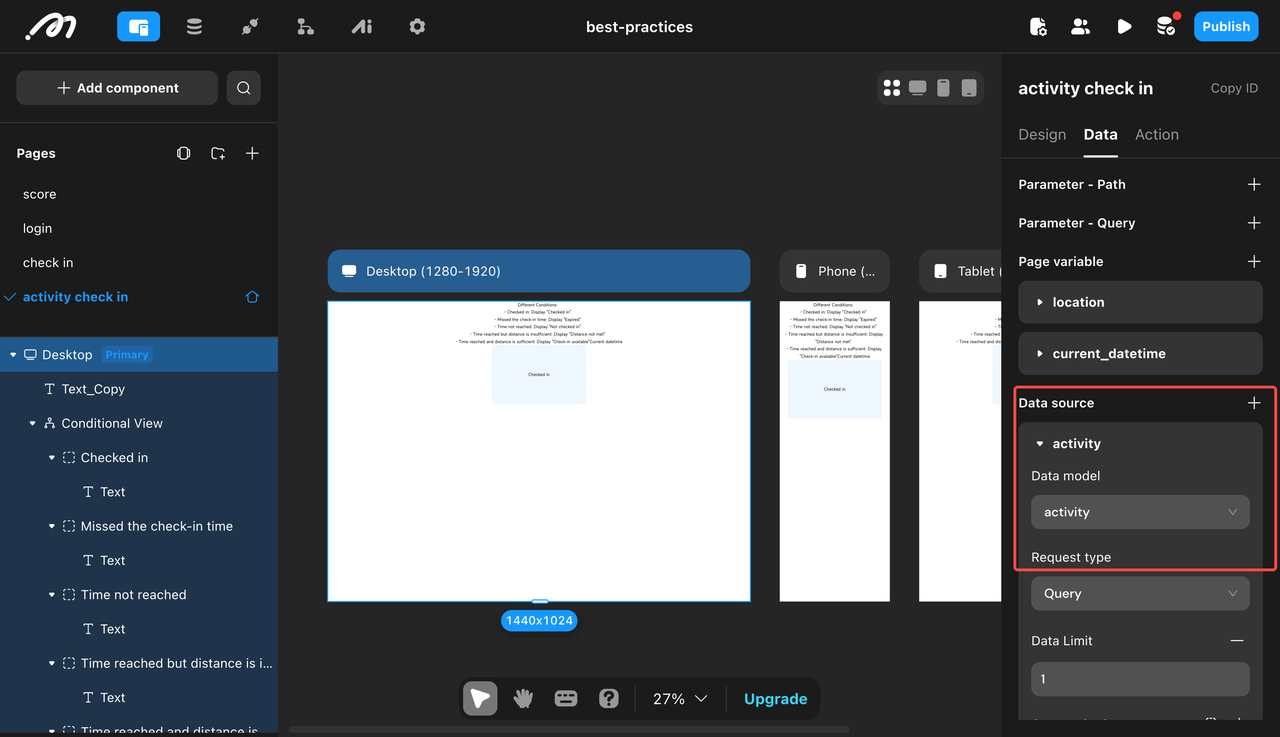
Retrieve Event Information on the Page
Select the page and add a data source to fetch event data from the database. Pay attention to the filter conditions.
Retrieve User Information
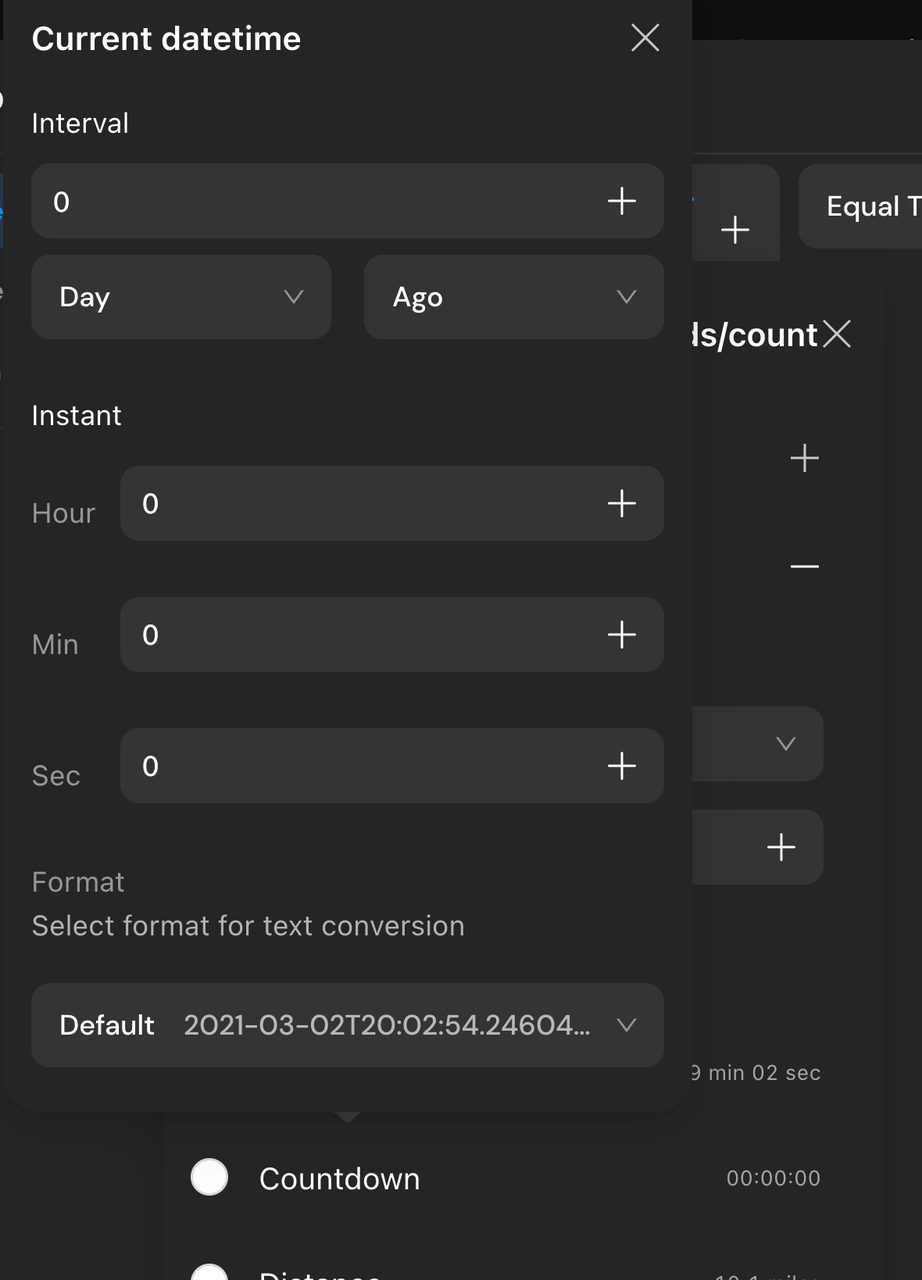
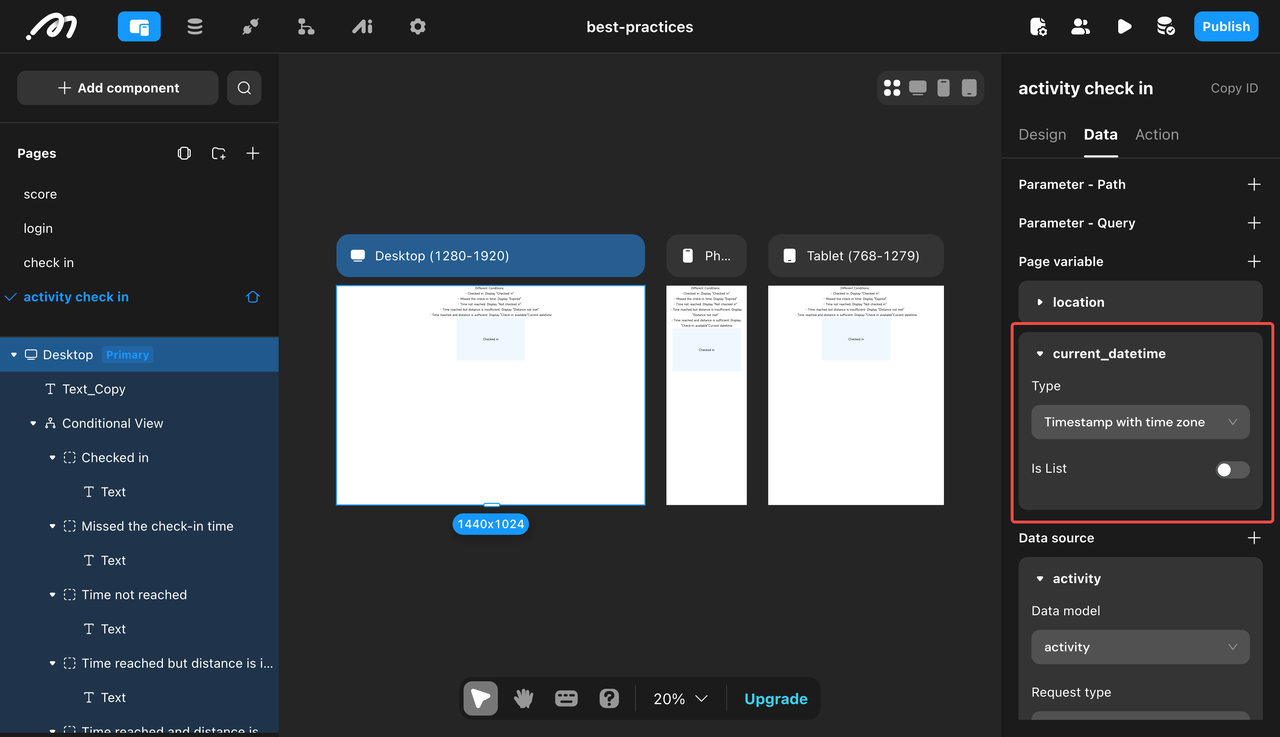
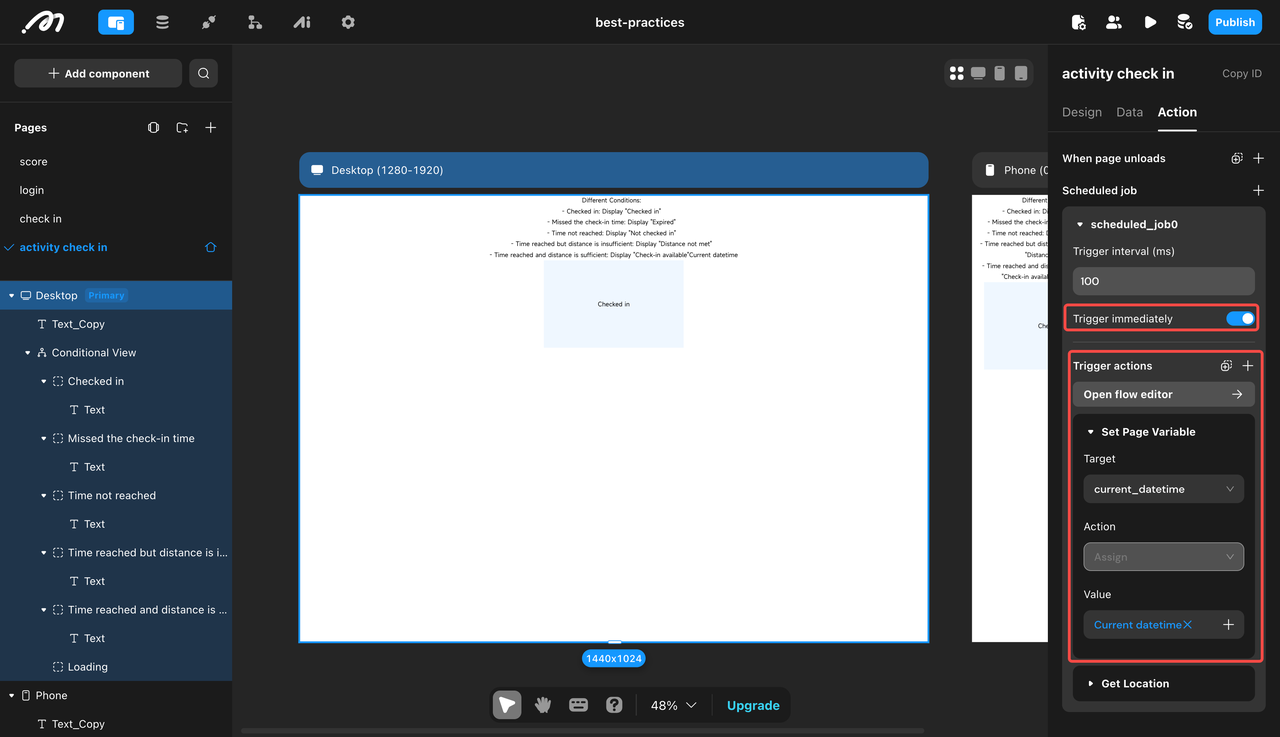
Get Real-Time Date and Time
Create a
page variable-current_datetime, with the type set to DateTime (with timezone).
Create a scheduled job, enable the "Trigger Immediately" button, and add a trigger action to set the page variable. Set the target to the page variable
current_datetimecreated in the previous step, with the value set to Constant Data / Current DateTime.
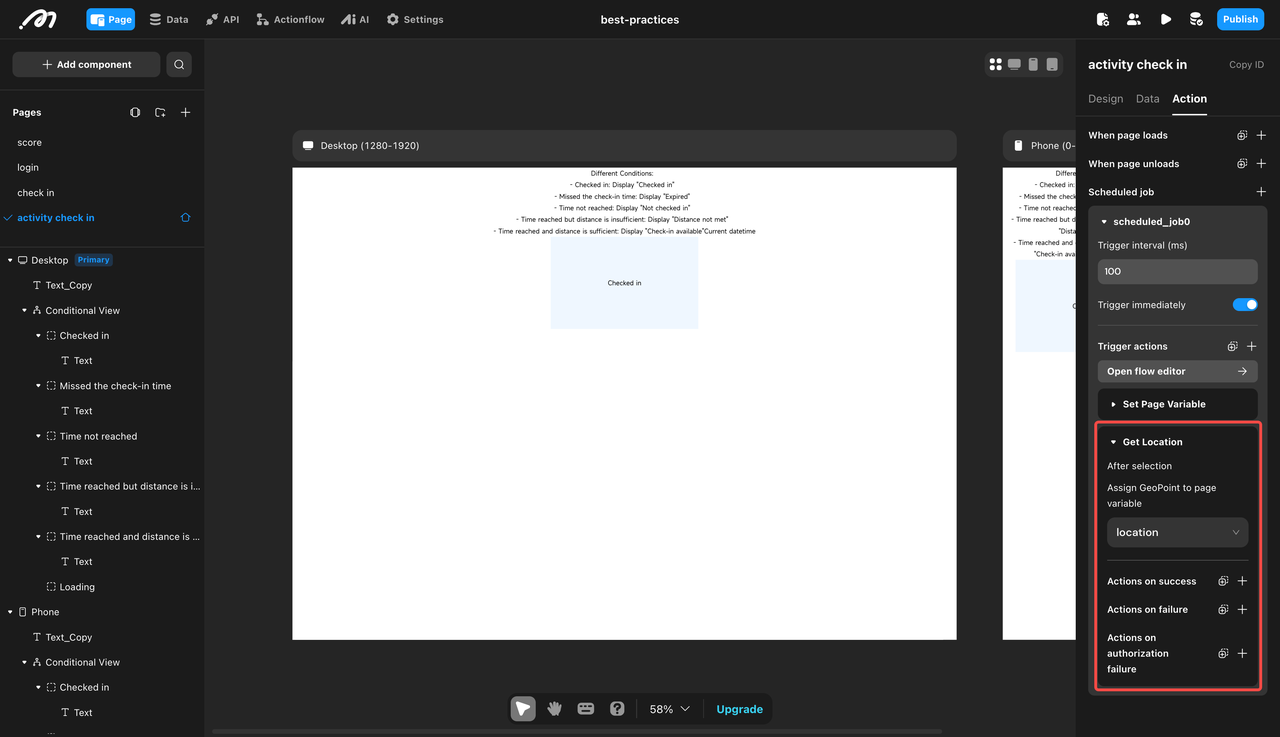
Get Real-Time Latitude and Longitude
Create a page variable
current_location, with the type set to Geo point.

Select the scheduled task created earlier, add an action
Location / Get Location, and select the page variablecurrent_locationfrom the previous step.
Condition Configuration
Sort Conditions Based on Requirements:
The highest priority in the requirements is to determine whether the user has checked in. If the user has already checked in, regardless of other conditions, it should display "Checked In".
The next priority is time. Conditions can be divided into three major blocks based on time, with the key time points being the check-in start time and check-in end time:
Before ~ Check-in Start Time: If the user’s current time falls in this range, display "Event Has Not Yet Started".
Check-in Start Time ~ Check-in End Time: Within this time range, additionally check the distance between the user and the event location, dividing it into "Not Within Check-in Range" and "Start Check-in".
Check-in End Time ~ After: If the user’s current time falls in this range, display "Expired".
Add a conditional container and configure five conditional sub-containers based on the analysis above. Assign text components to each sub-container.
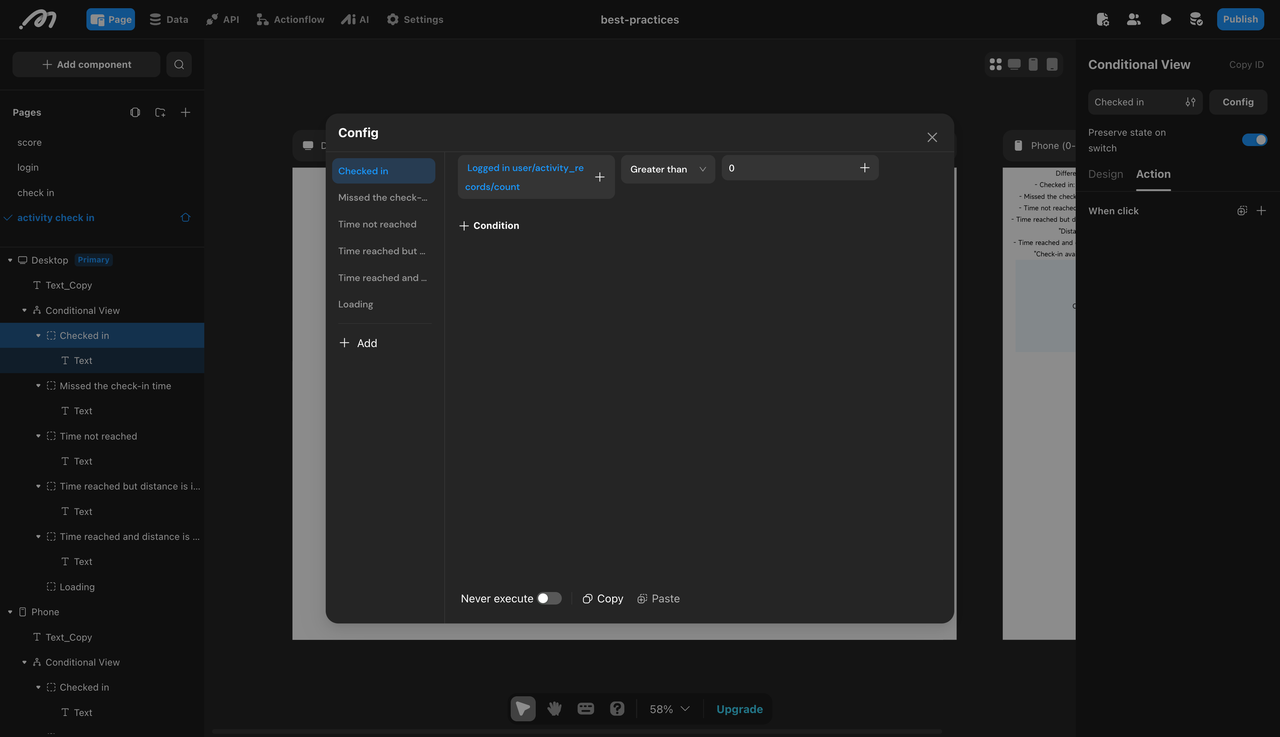
Set Specific Conditions:
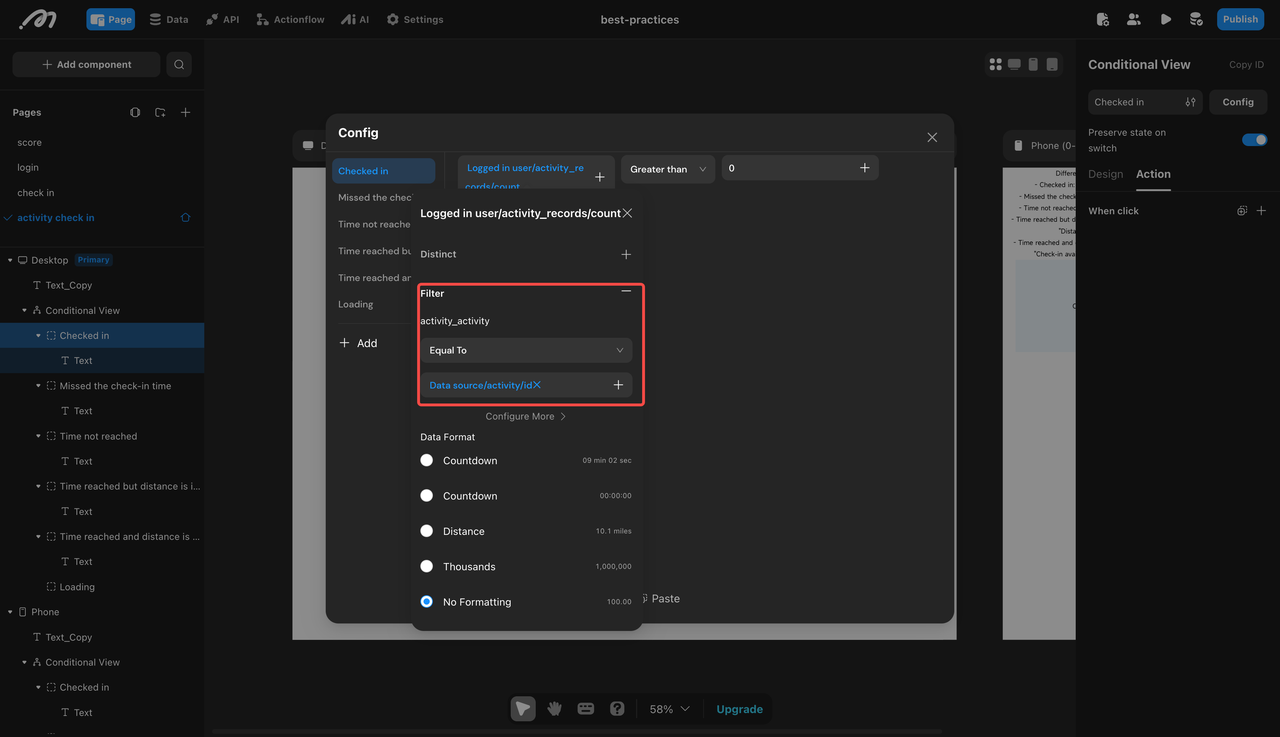
Checked In:
Current user data - Activity check-in records - Count > 0. Note: Add a filter to the count.
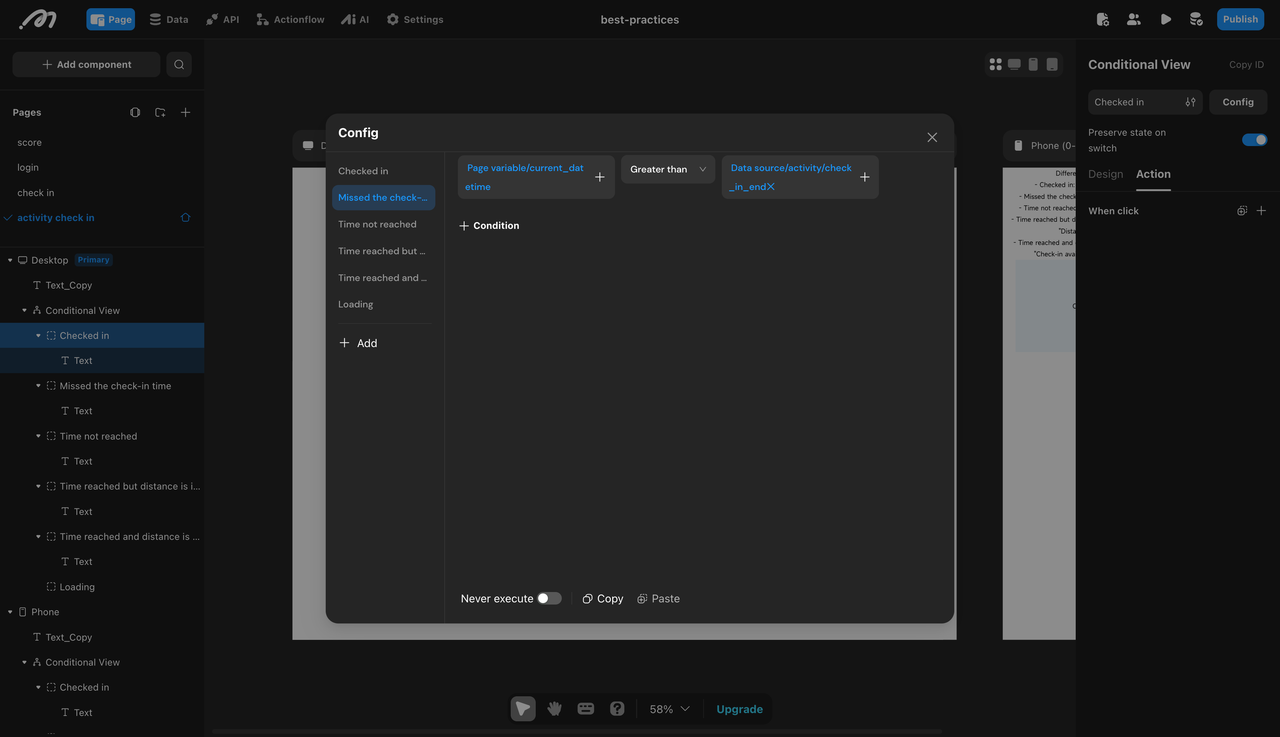
Past Check-in Time:
Data source - Activity - Check-in expiration time < Page variable - current_datetime.
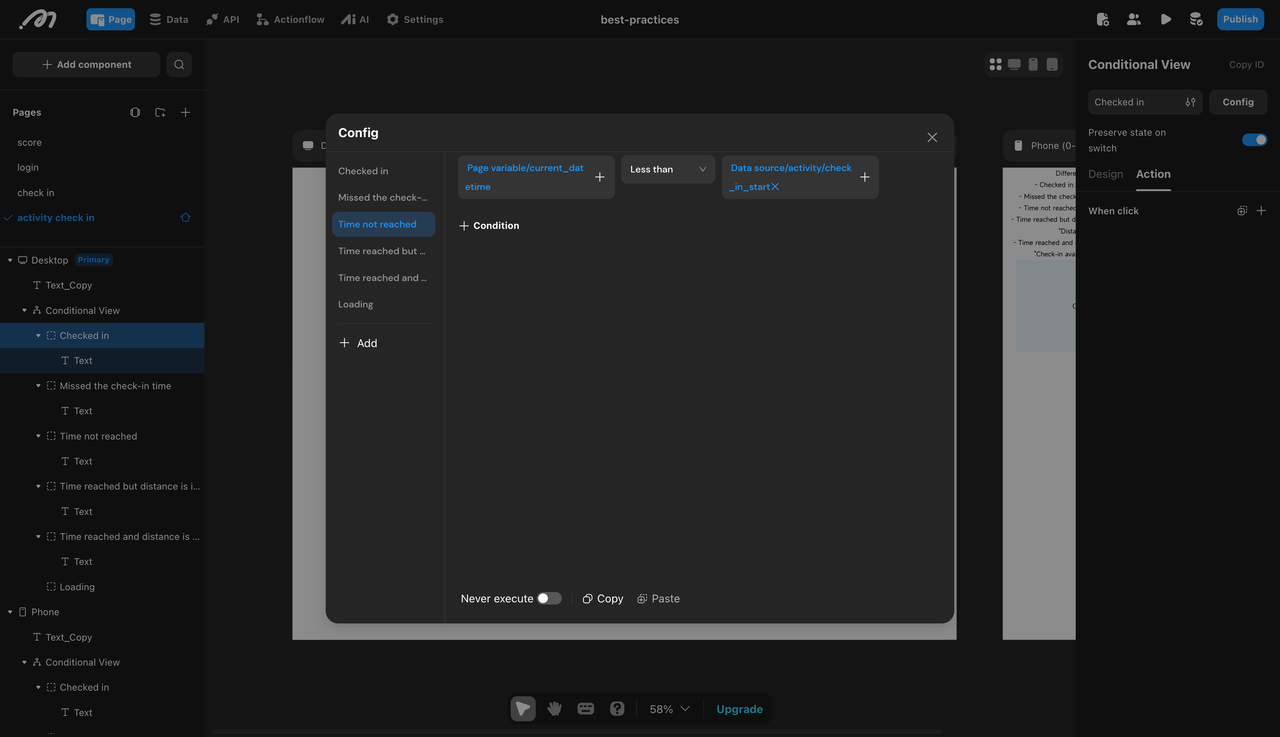
Before Check-in Time:
Data source - Activity - Check-in start time > Page variable - current_datetime.
At Check-in Time but Distance Insufficient:
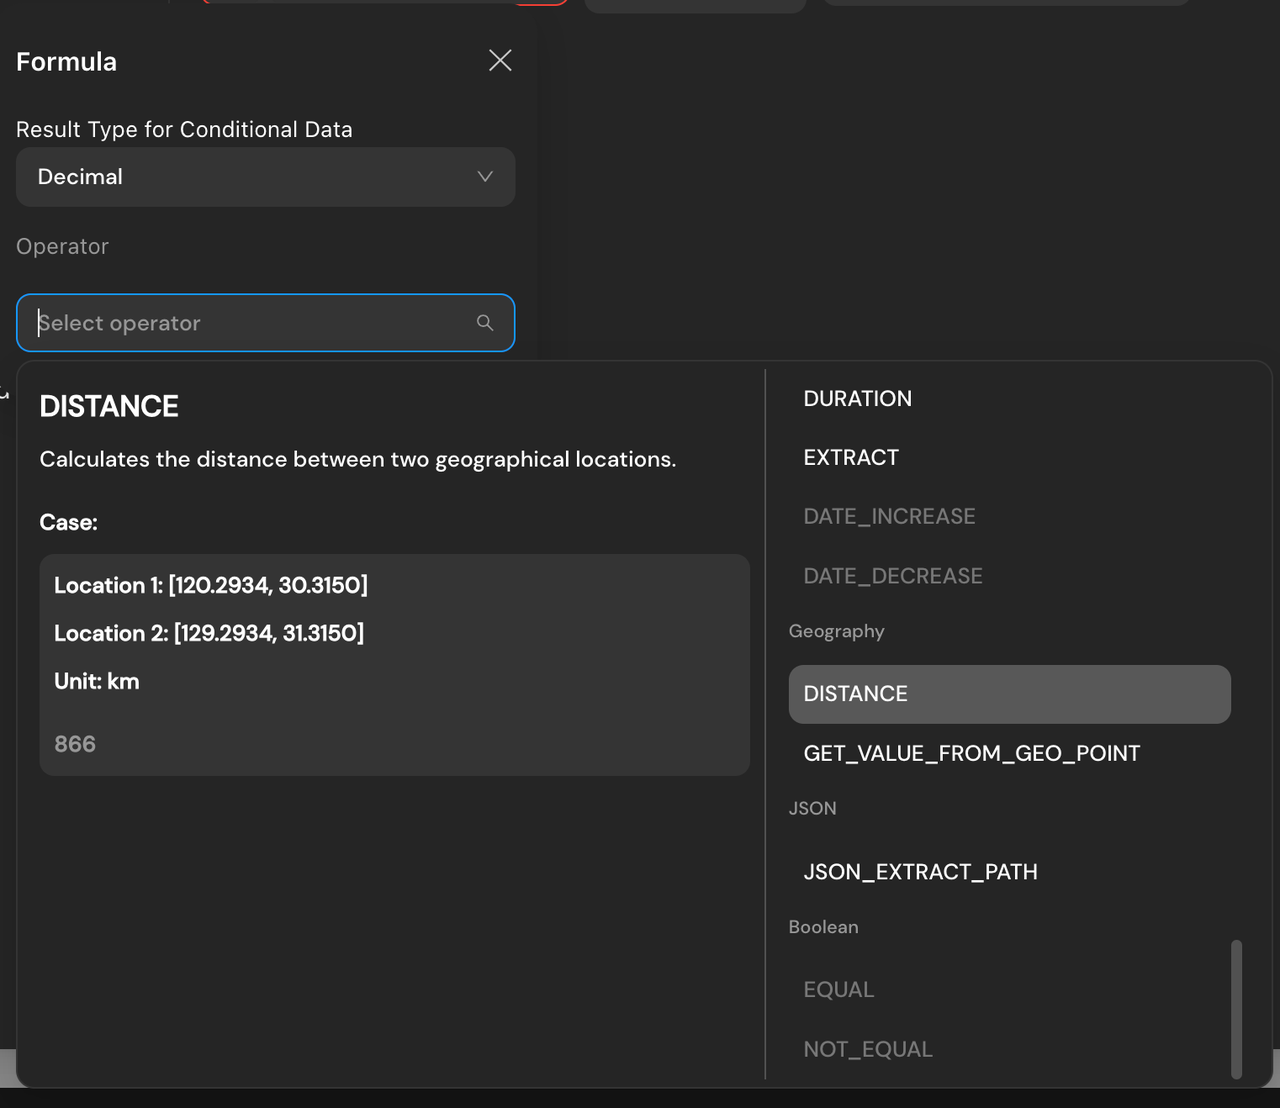
Select "Formula" for the operand.
Set the formula result type to "Infinite Precision Decimal" and the method to "DISTANCE".
Assign "Location 1" to
Page variable - current_location, and "Location 2" toData source - Activity - Check-in location.
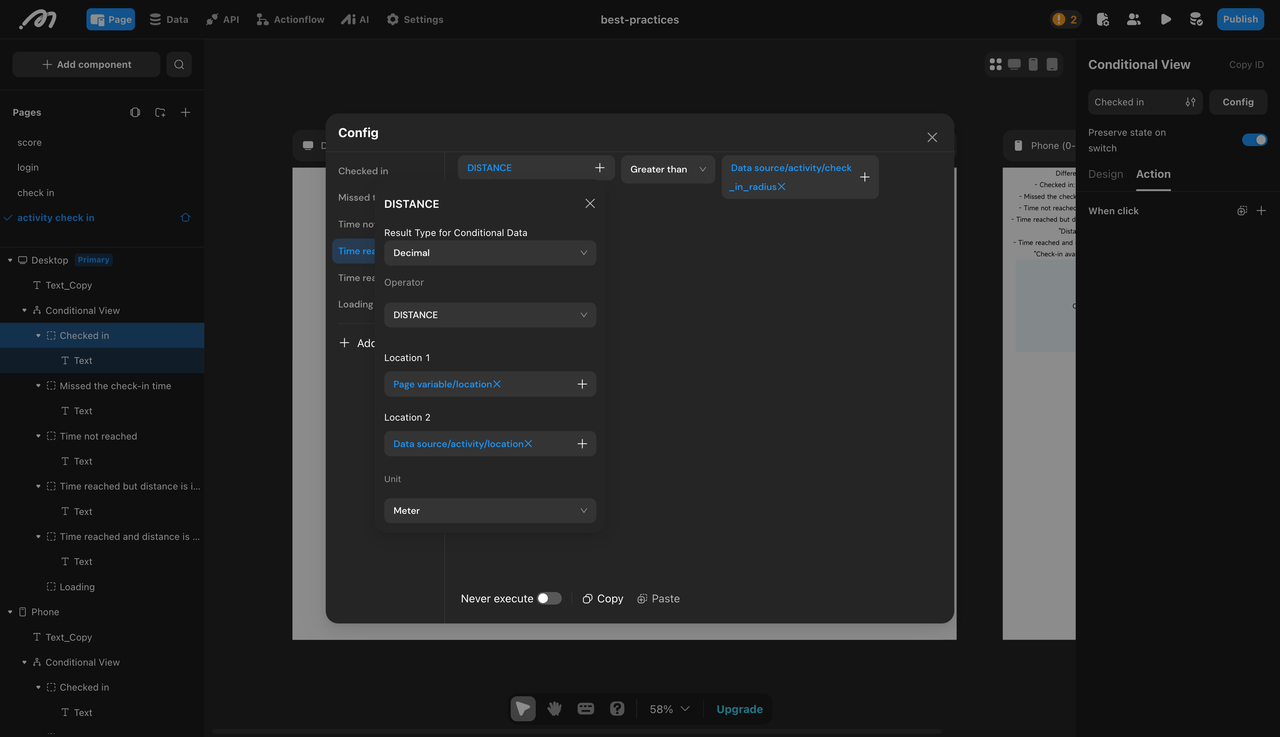
Set the
distance > Data source - Activity - Check-inrange.

At Check-in Time and Within Range: No additional configuration needed.
Action Configuration
Select the conditional sub-container for "Time Has Arrived and Distance is Sufficient". Add an action
mutation -insert activity check-in record. Assign the parameter "User - Account" toCurrent user data - ID, and activity_activity toData source - Activity - ID.
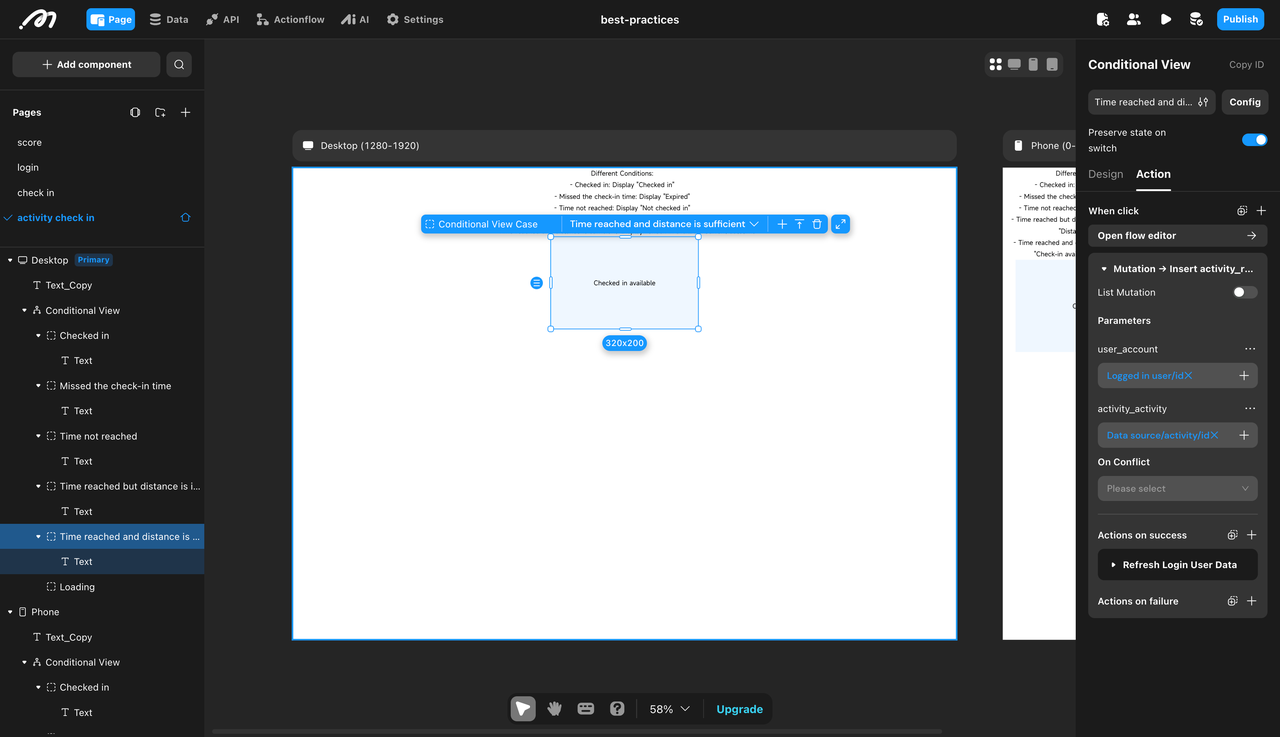
Configure "Refresh Current User Data" for the action’s success case.
Conclusion
You’ve now built a fully functional Check-In system using Momen! 🚀
Basic Version: Simple online check-in.
Advanced Version: Check-in with time & location constraints.
This system can be used for workplace attendance, event participation, and activity tracking—all without writing a single line of code.
For a more detailed guide, check our video tutorial: