Building a Full-Stack AI Trip Planner with Momen and Cursor: A Step-by-Step Guide

Watch the live building demo on Youtube
Cursor is amazing.
If you already know how to code, it feels like magic: you describe what you want, and Cursor generates clean React components, API calls, and even complex logic.
But if you don’t have a technical background, there’s often a moment of confusion:
“This looks great… but where is my data stored?”
“Who is handling authentication?”
“What actually happens when the AI generates something?”
If you’re comfortable with code, Cursor can generate servers, APIs, database logic, and complex workflows just fine. However, for people who don’t know code, frontend is visual but backend is invisible. You can see pages, buttons, layouts, and flows immediately. Data models, authentication, AI workflows, and payments all happen behind the scenes.
That’s where using a visual, no-code backend like Momen makes a big difference.
Momen makes the “invisible” parts of an app visible — databases, logic, AI flows, and payments — so non-technical builders can understand what exists behind the UI, while Cursor continues to generate high-quality code on top of it.
In this tutorial, we’ll walk through how to build a production-ready AI Trip Planner using:
Cursor as your AI-powered code editor (for the frontend)
Momen as your no-code backend (for everything behind the scenes)
You don’t need to understand backend code. You just need to understand what pieces exist and how they connect.
Learn from the step-by-step Cursor x Momen tutorial: https://github.com/momen-tech-org/momen-cursor-rules
Why Momen Is a Great No-Code Backend for Cursor
Momen is a next-generation full-stack no-code platform, but its backend is designed to be used independently as a Backend-as-a-Service (BaaS). It lets you see and manage everything behind the app, without writing backend code.
You can visually set up:
Your data (like trips, users, and orders)
Your app logic (what happens step by step)
Payments and user accounts
Then Cursor builds a custom frontend on top of that structure.
In simple terms:
Momen handles what’s behind the scenes
Cursor handles what users see and interact with
Because the backend is clearly defined, Cursor doesn’t have to guess — it builds with confidence.
For non-technical builders, this turns the backend from a “black box” into something you can actually understand and trust.
What We’re Going to Build

We’ll build an AI Trip Planner where users can:
Sign up and log in
Enter a destination, budget, and trip length
Use AI to generate a day-by-day itinerary
Spend credits (purchased via Stripe)
View saved trips and details
Momen will handle all backend logic.
Cursor will generate the frontend UI.
Step 1: Design the Data in Momen
Every app starts with data.
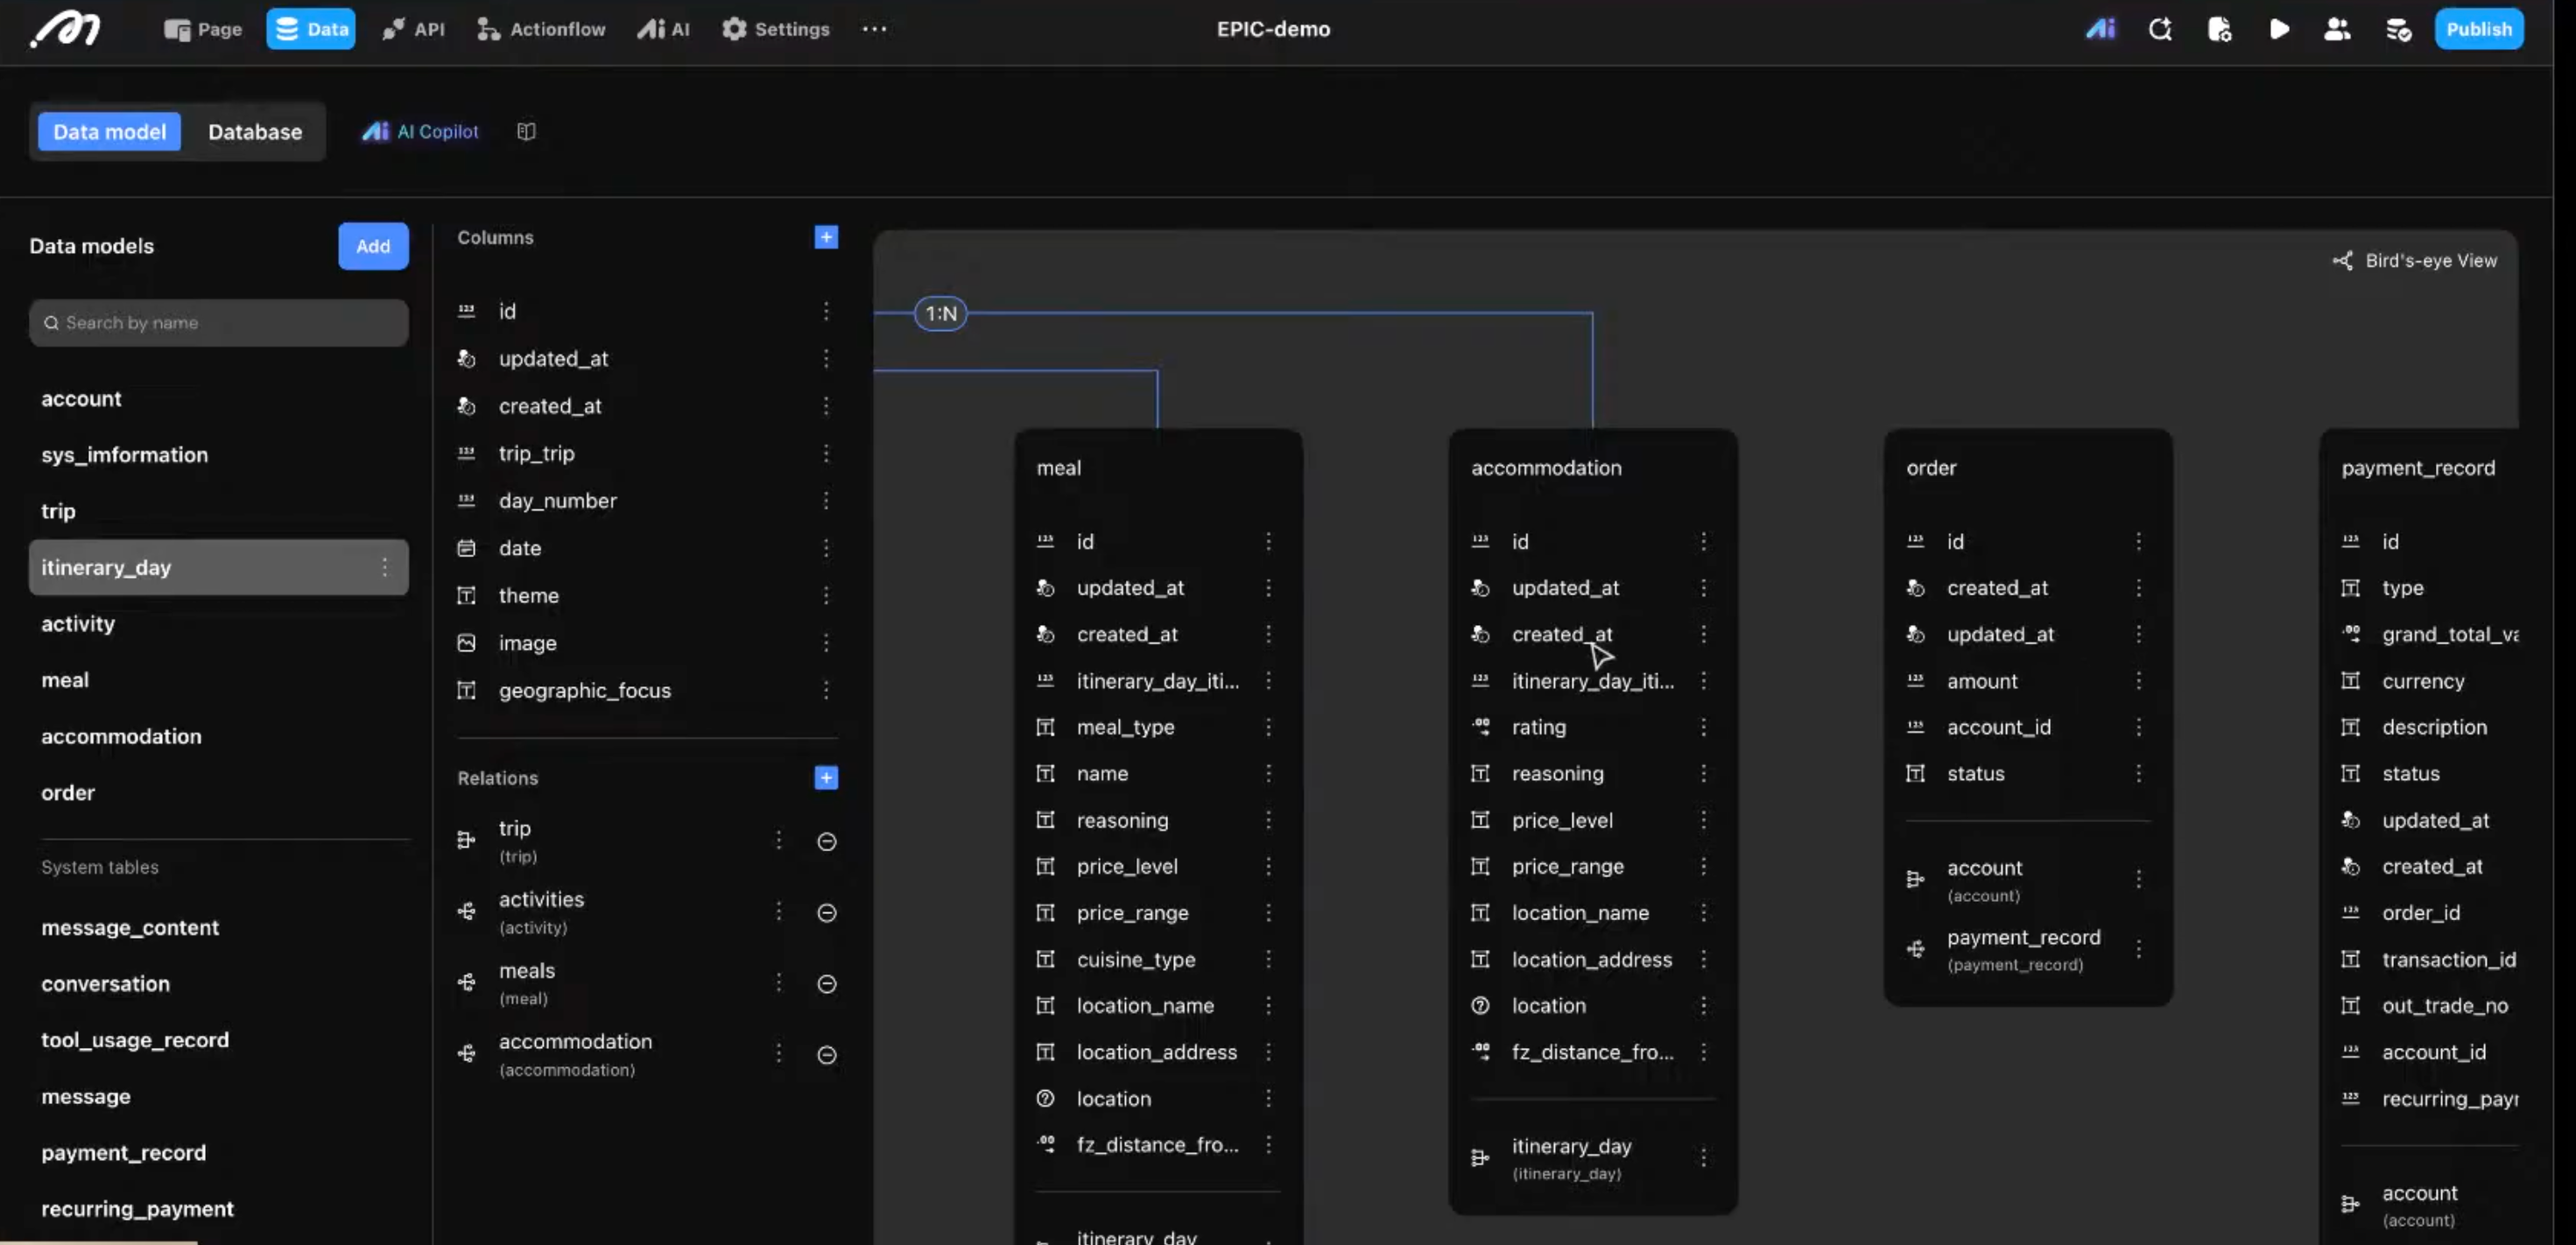
Before you build any UI, you need to decide what information your app stores and how those pieces relate to each other. In Momen, you do this visually by defining your database tables and relationships.
For the AI Trip Planner, the core data models look like this:
Trip
Stores destination, start date, budget, and the owner of the trip.Itinerary Day
Each trip contains multiple days.Activities / Meals
Each day contains multiple activities or restaurant suggestions.Account / Orders
Tracks user credits and Stripe payment history.
You can build these tables manually, or use Momen AI Copilot to generate them for you.
With Copilot, you simply describe your app’s data structure in plain language, and Momen creates the tables and relationships automatically — no SQL, no migrations, no backend setup by hand.
Resources
Step 2: Set Up the AI Agent (Structured, Not Just Text)
To make the trip planner usable in a real app, the AI must return structured data, not just free-form text.
In Momen, you can visually configure an AI agent to control what the AI receives, how it reasons, and what format it returns.
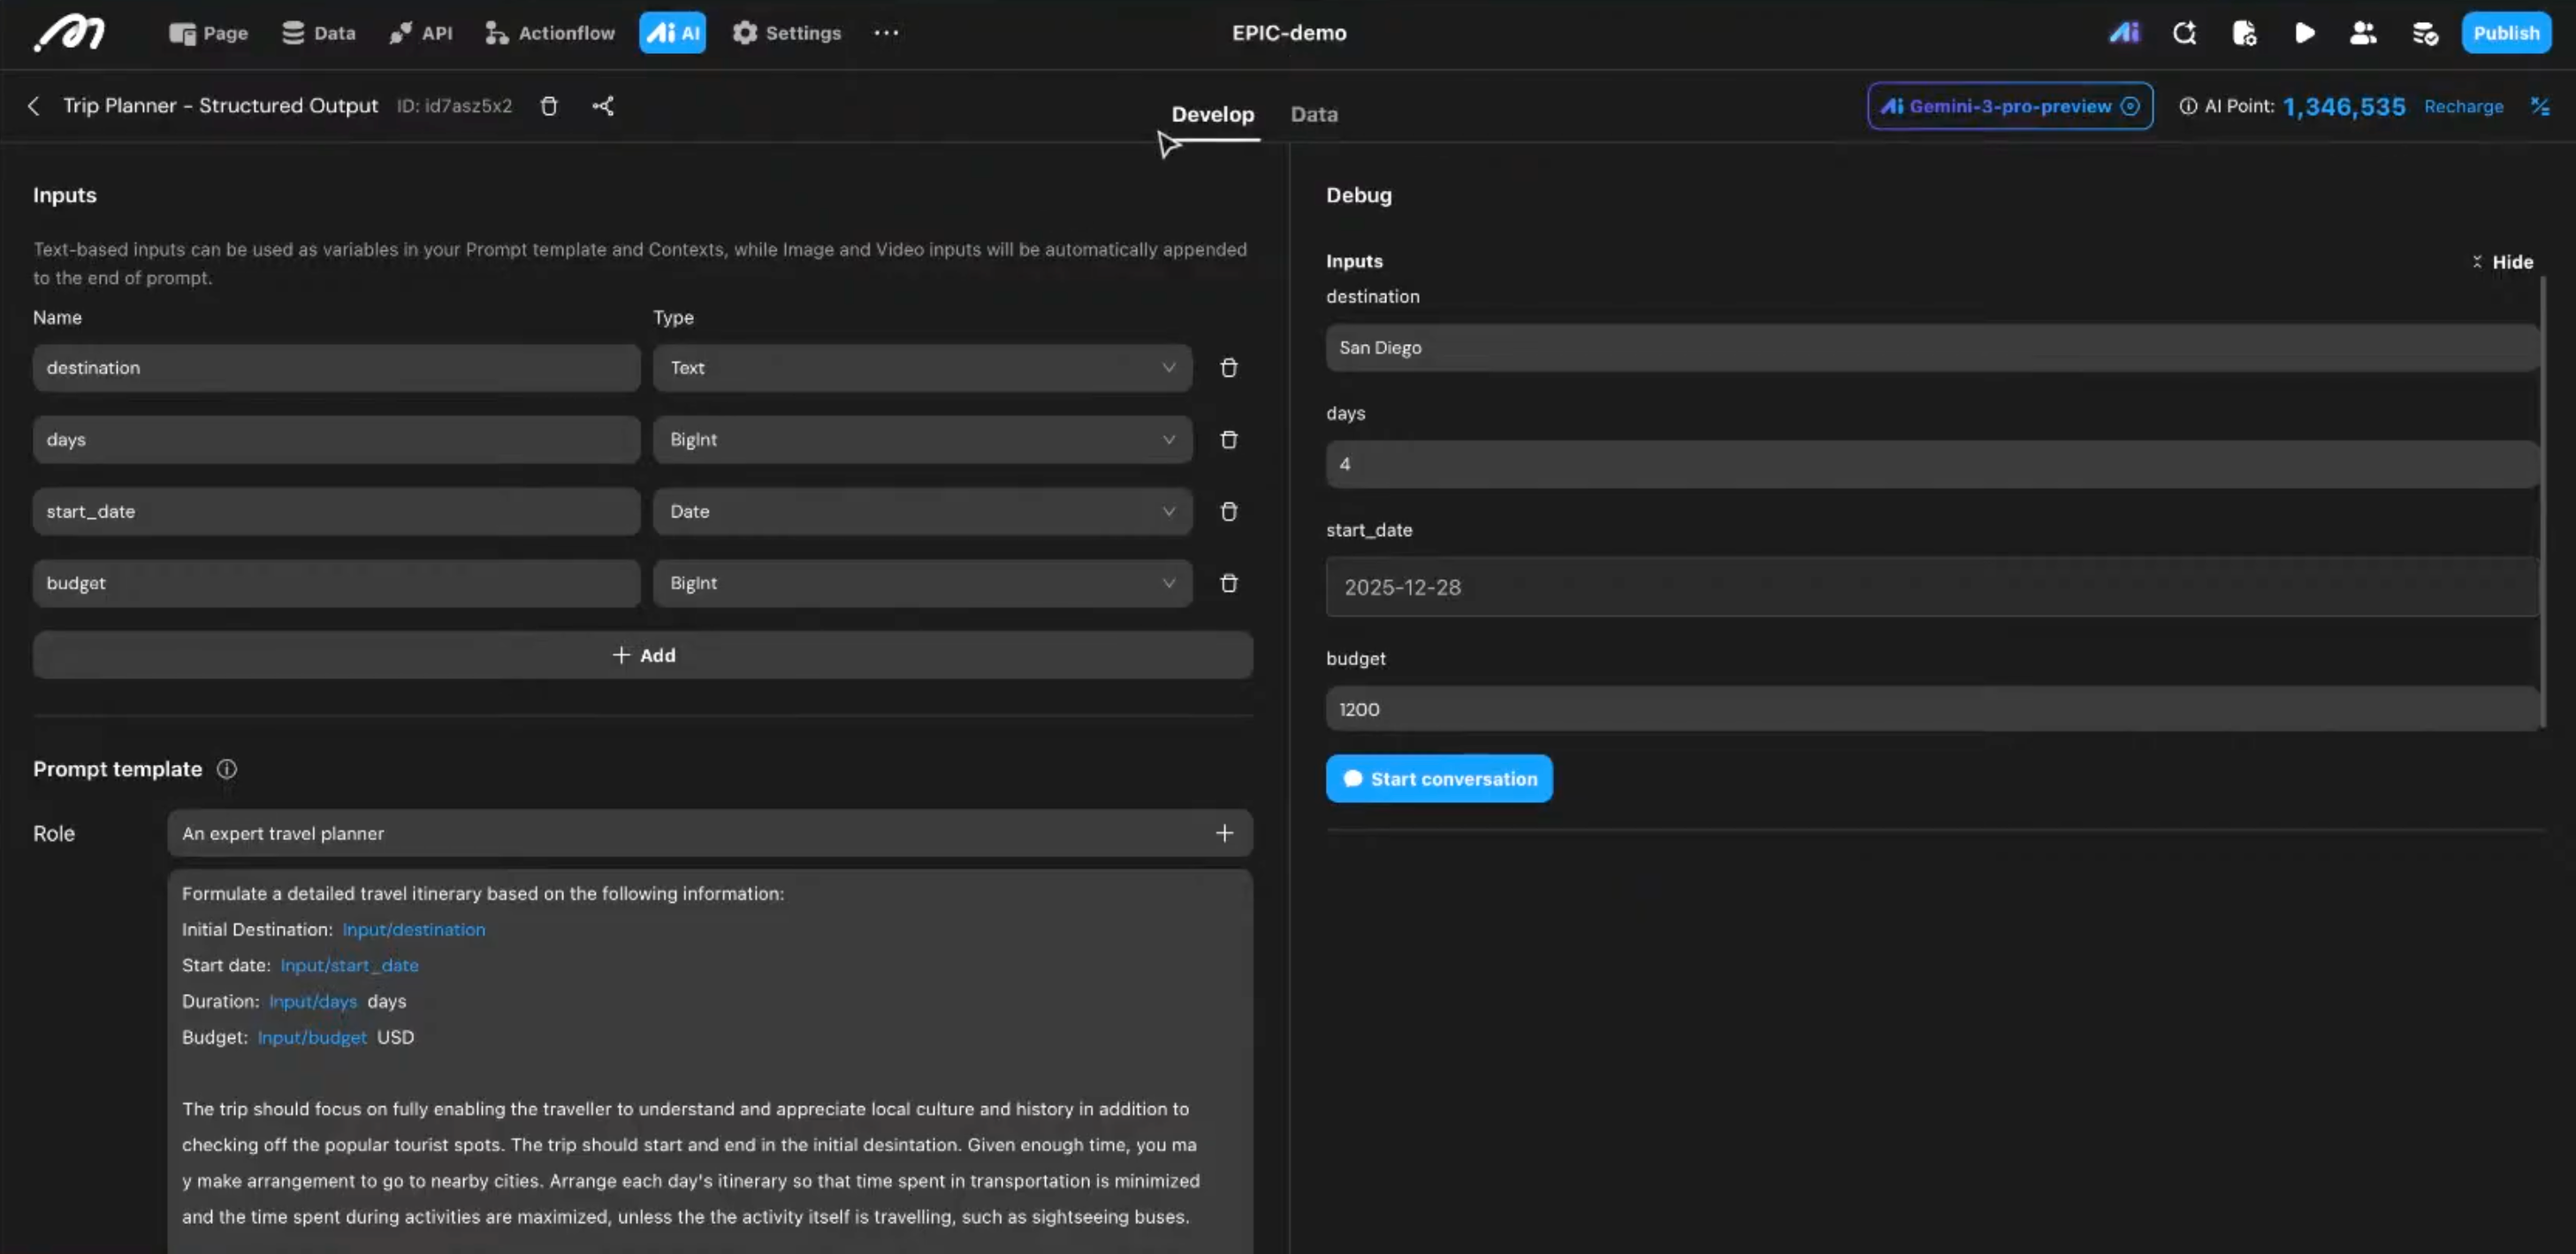
1. Define the AI inputs and Prompt Template
In Inputs, define what data the agent will receive from your app.
Inputs can be different types, such as text, number, or date.
For this example, define:
Destination
Duration
Budget
These inputs come directly from your frontend.
Then, configure the AI Prompt Template.
In the Prompt Template, describe:
The agent’s role
The task it should perform
The constraints it must follow
Make sure to connect the inputs you defined above into the prompt.
This tells the AI what to do and how to do it.
2. Configure tool use
In Tool Use, connect third-party APIs (such as Google Places API) so the AI can reference real locations and external data when generating results.
3. Define structured output
Define a fixed output schema so the AI always returns structured JSON, for example:
Daily itinerary
Activity list
Location name and time
This allows your backend and frontend to reliably parse and display the result.
Resources:
Step 3: Create Backend Action Flows
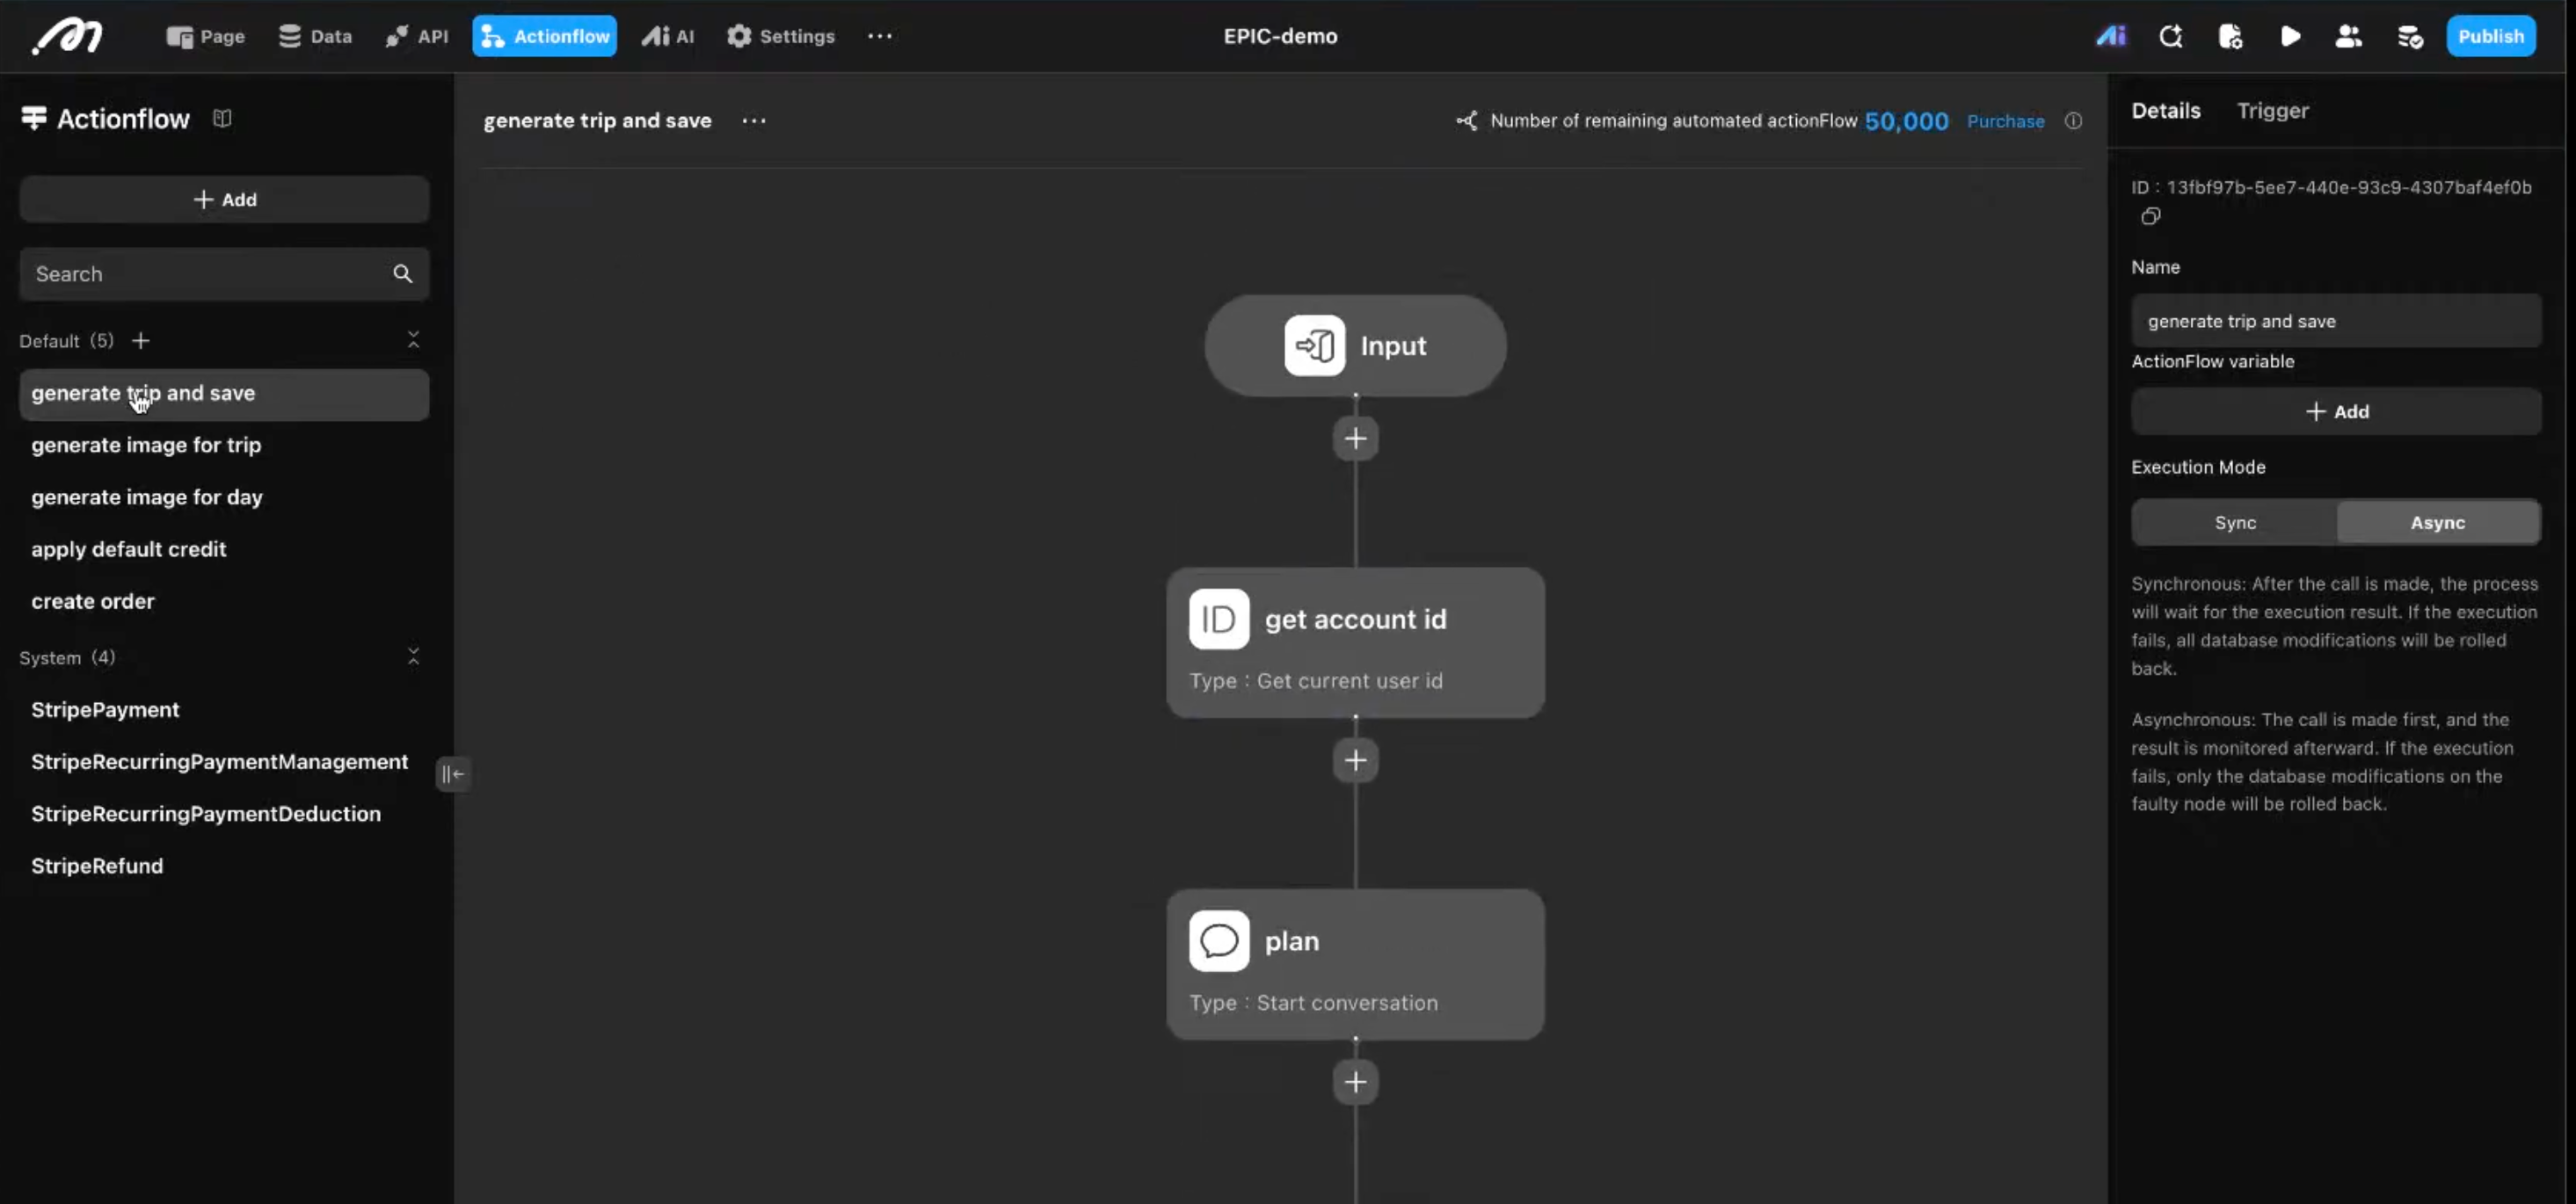
Action Flows define what actually happens when a user clicks “Generate Trip”.
They are the backend workflows that control the full execution process.
In Momen, use Action Flows to:
Trigger AI calls
Process and transform data
Handle webhooks from external systems
For this app, you will set up multiple workflows under different conditions.
In Momen, this is done visually — like building a mind-map style process, where each step is an action in the flow.
For example, one Action Flow might:
Check and deduct user credits
Trigger the AI agent
Loop through the AI output
Save each day and activity into the database
Trigger a secondary AI agent to generate cover images
All of this logic lives entirely in the backend — where it belongs.
Cursor does not need to recreate this logic.
It simply calls one Action Flow and receives the result.
Resources:
Step 4: Let Cursor Understand Your Backend

Now we connect everything to Cursor.
You’ll:
Add the Momen MCP server to Cursor settings
Add the Momen Cursor Rules to your project
Open your project in Cursor and provide AI with your Momen details to start vibing your frontend.
The rules teaches Cursor:
How your database is structured
How to call Momen’s GraphQL APIs
How authentication and action flows work
From this point on, Cursor is no longer guessing.
Step 5: Ask Cursor to Build the Frontend

Now comes the fun part.
You can prompt Cursor with something like:
Build an AI Trip Planner using the Momen backend for Project [ID].
Use React + Vite.
Include login, a trip dashboard, and a trip generation form.
Cursor will:
Implement authentication correctly
Fetch and display trips
Trigger backend action flows
Integrate Stripe checkout using your publishable key
You get a working UI in minutes.
Step 6: Polish and Debug with AI
Once your main flows are working, the final step is polishing and debugging — both in Momen and in Cursor.
When you change anything in the backend:
Always click “Sync Backend” to apply and confirm your latest changes
To debug efficiently:
Use Logs in Momen to inspect errors and execution steps (AI-assisted)
Use Mirror Preview to test end-to-end behavior:
Even if your main frontend is external, drag a few test components into Momen
Run AI, Action Flows, permissions, and payments in a full flow
Use login simulation to test different user roles and permission scenarios
This helps you verify that your backend logic works correctly before connecting it to production UI.
When you’re unsure:
Use AI Copilot (Knowledge Mode) to ask anything Momen-related while building
Get instant explanations about data models, Action Flows, permissions, or AI agents
On the frontend side, ask Cursor to refactor and clean AI-generated code once the core flow works
Together, this final pass turns a working demo into a stable, production-ready app.
What This Approach Gives You
By combining Cursor + Momen, you get:
AI-generated frontend code
A real backend you don’t have to code
Clear separation between UI and logic
An app that can scale beyond a demo
You’re not locked into templates.
You’re building a real product.
Where to Go Next
Add user preferences (e.g. family-friendly, budget travel)
Expand the AI agent with more tools
Deploy the frontend on Vercel or Netlify
Keep iterating—without rebuilding your backend
Final Thought
Cursor makes building feel possible in a way it never did before.
If you can explain your idea clearly, you can already start turning it into something real.
What usually separates a quick demo from a real product is how the “behind the scenes” parts are handled — data, logic, AI flows, and payments. For many non-technical builders, having those parts visible and structured makes it much easier to keep building in public and iterating with confidence.
Momen is one way to support that journey. It gives your ideas a real backend to grow on, while Cursor helps you move fast on the frontend. It’s not the only way — just a practical one if you want to go from idea to something real, sooner.
If you’re curious, try building something small.
Share it. Improve it. Break it. Repeat.
And if you want a backend that stays out of your way while you do that, you can explore Momen+Cursor here: https://github.com/momen-tech-org/momen-cursor-rules
Explore Momen: https://momen.app/